
Rebuild a Failed VCF Managed Host
Replace a Host With Custom NIC Mapping
The Issue? A host in the VCF Management Domain Failed
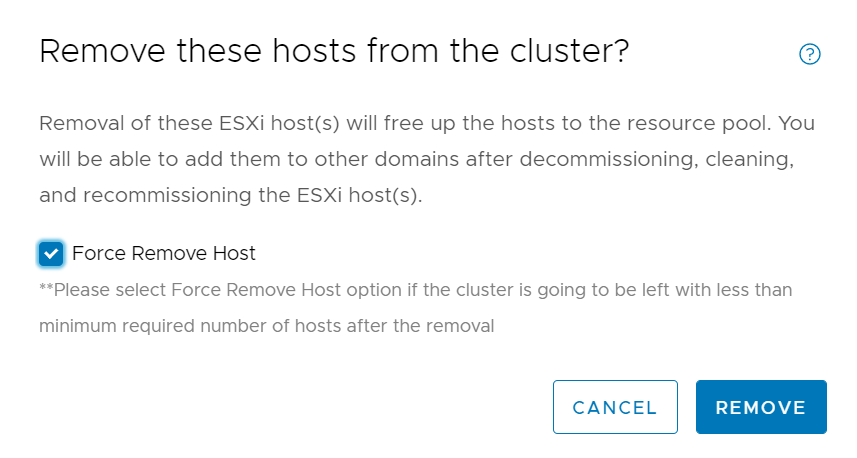
In this post I discuss the method I used to rebuild a failed VCF managed host. The host is already unresponsive, therefore, removing the host from the SDDC Manager inventory will not work. The images below show the process of attempting to remove the failed host through SDDC Manager.
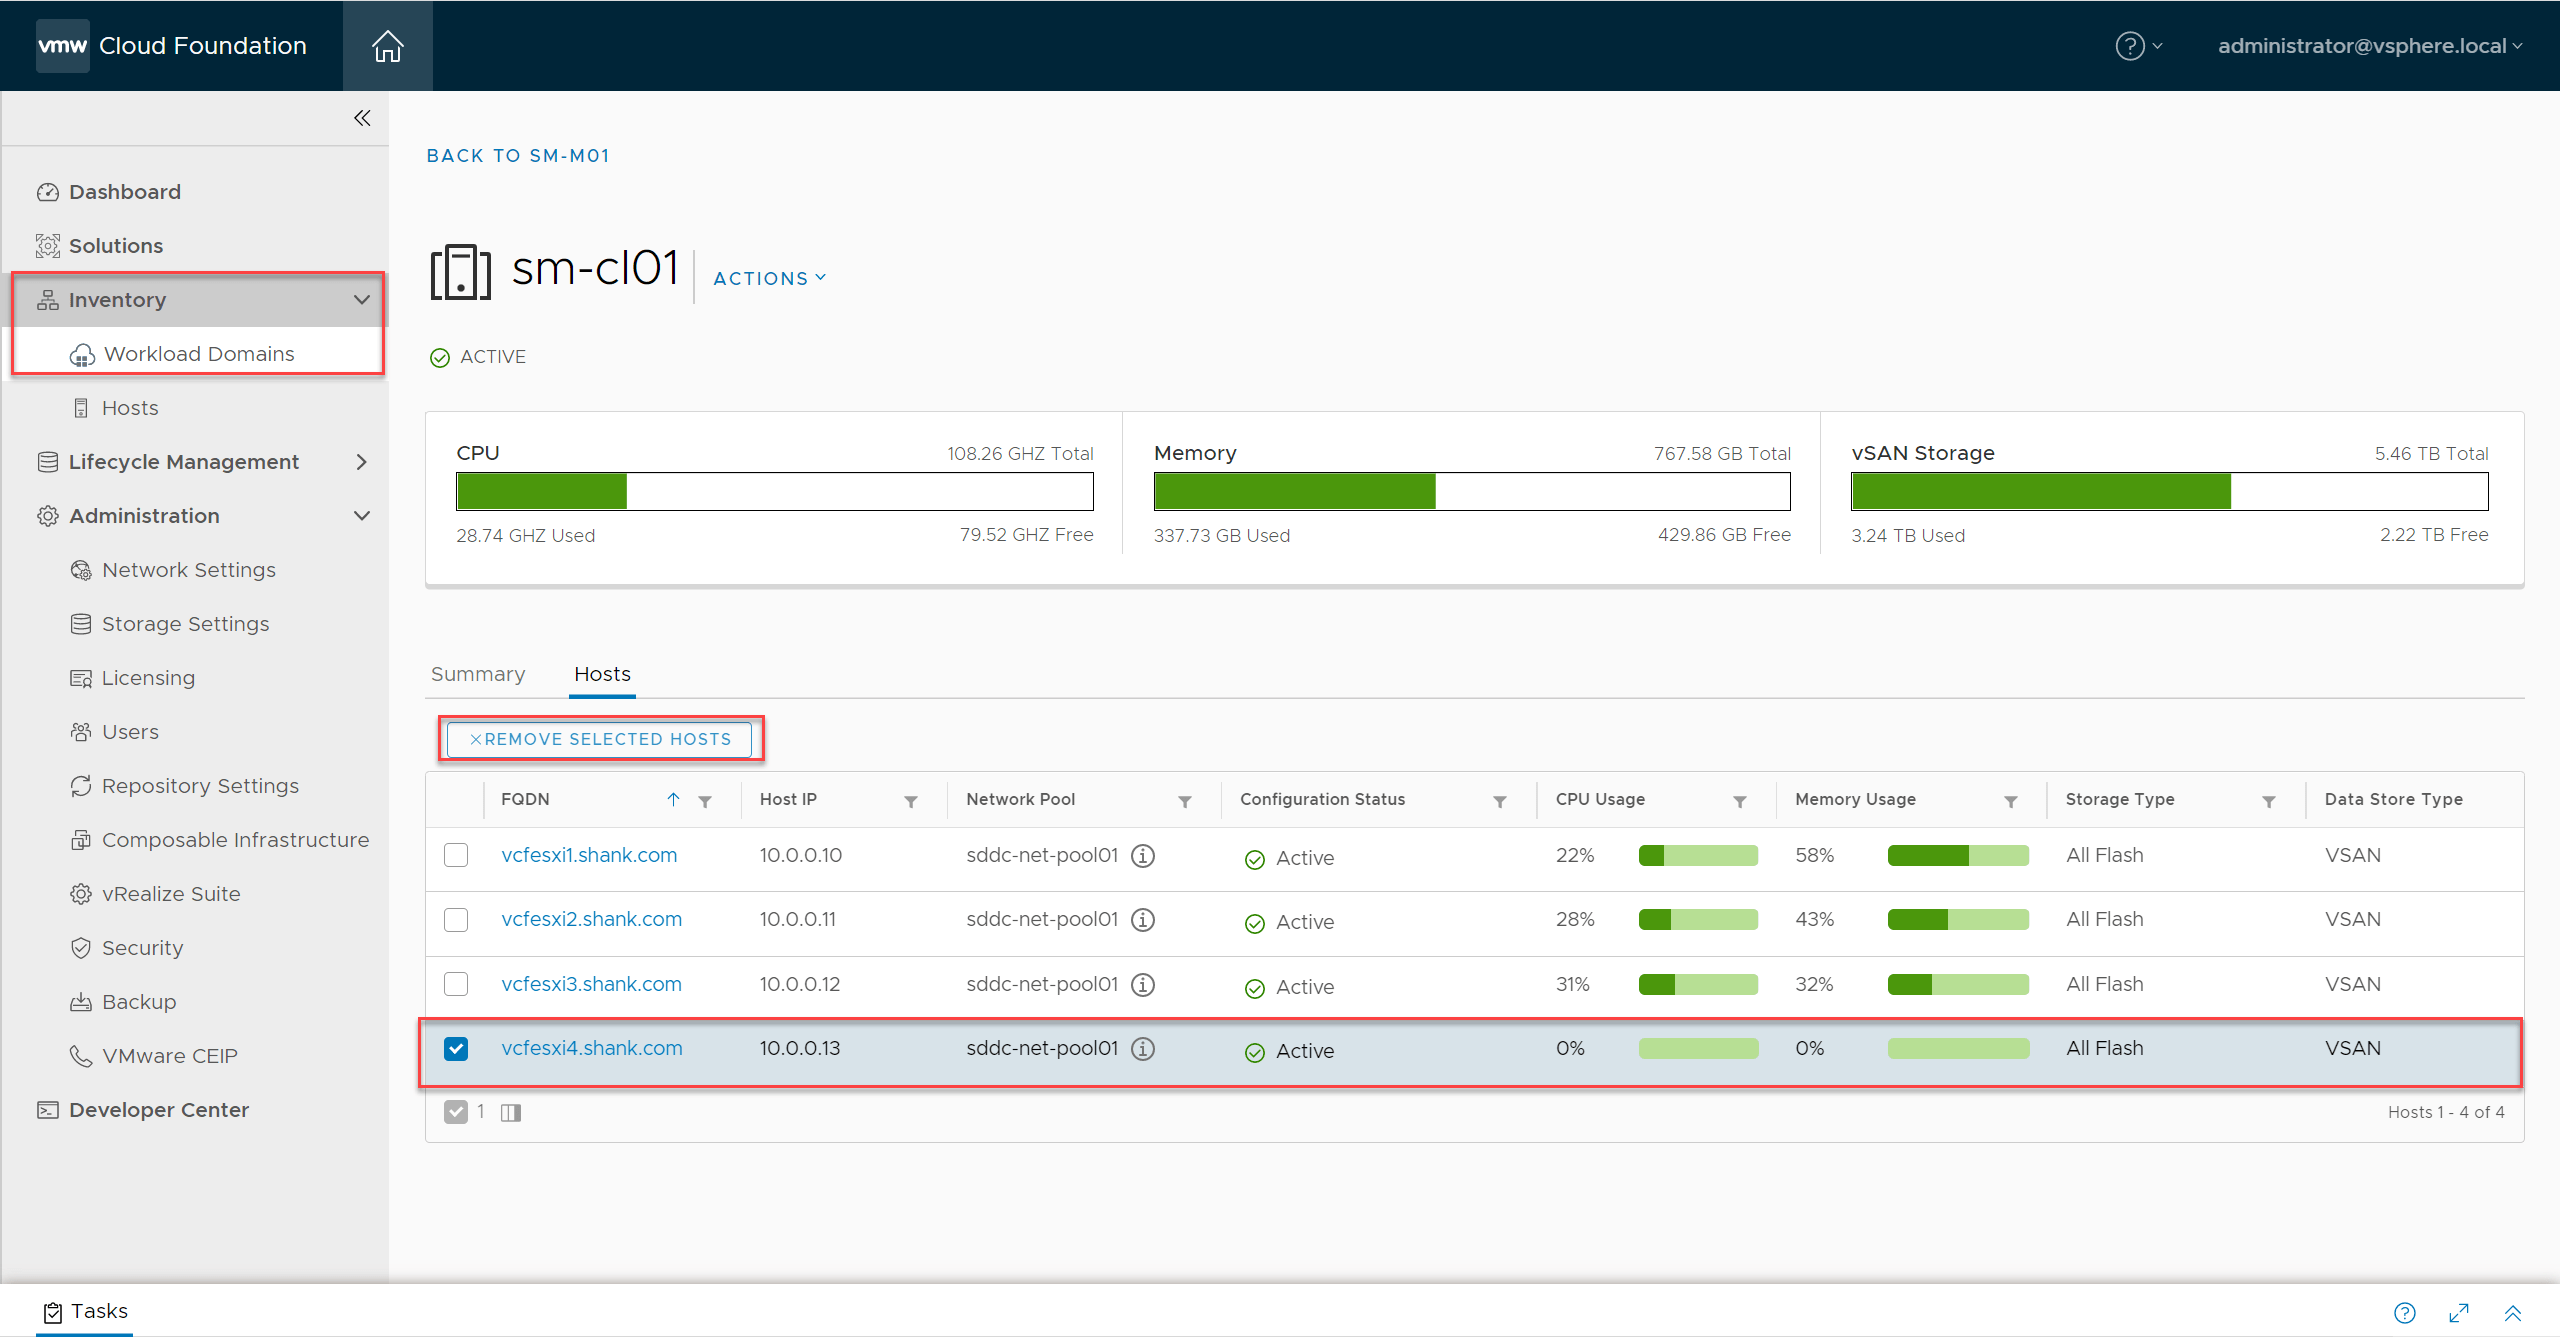
For some unknown reason, after attempting to remove the host, it remained in the cluster. Nothing at all happened. I had a quick look at the lcm, operationsmanager and domainmanager log files, and couldn’t see anything that stuck out.
The following section will demonstrate the method I used to remove the host from my inventory.
How to forcefully remove the failed host?
Step 1: Clean up the failed host
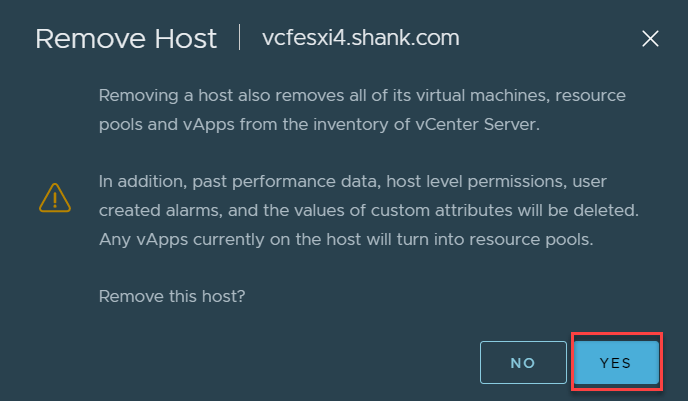
First, I removed the host from my vCenter inventory.

Confirm the removal.
The host will display as a standalone and disconnected host in NSX-T, it is now safe to remove it from there as well.

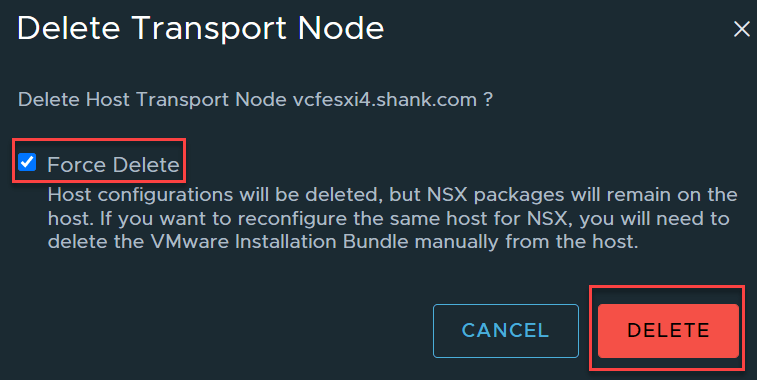
The host should now be removed from the NSX-T database.

Next, I followed the steps in my troubleshooting article to remove the host from the database, the instructions can be found here.
Once complete, the host will be removed from the SDDC Manager inventory, along with all its associated attributes.
Make sure you take a snapshot before making any database changes, performing database changes may leave you in an unsupported state.
Step 2: Commission the host
Once the host has been removed from the inventory, perform your maintenance tasks to resolve the underlying issue. This step will also work for brand new hosts.
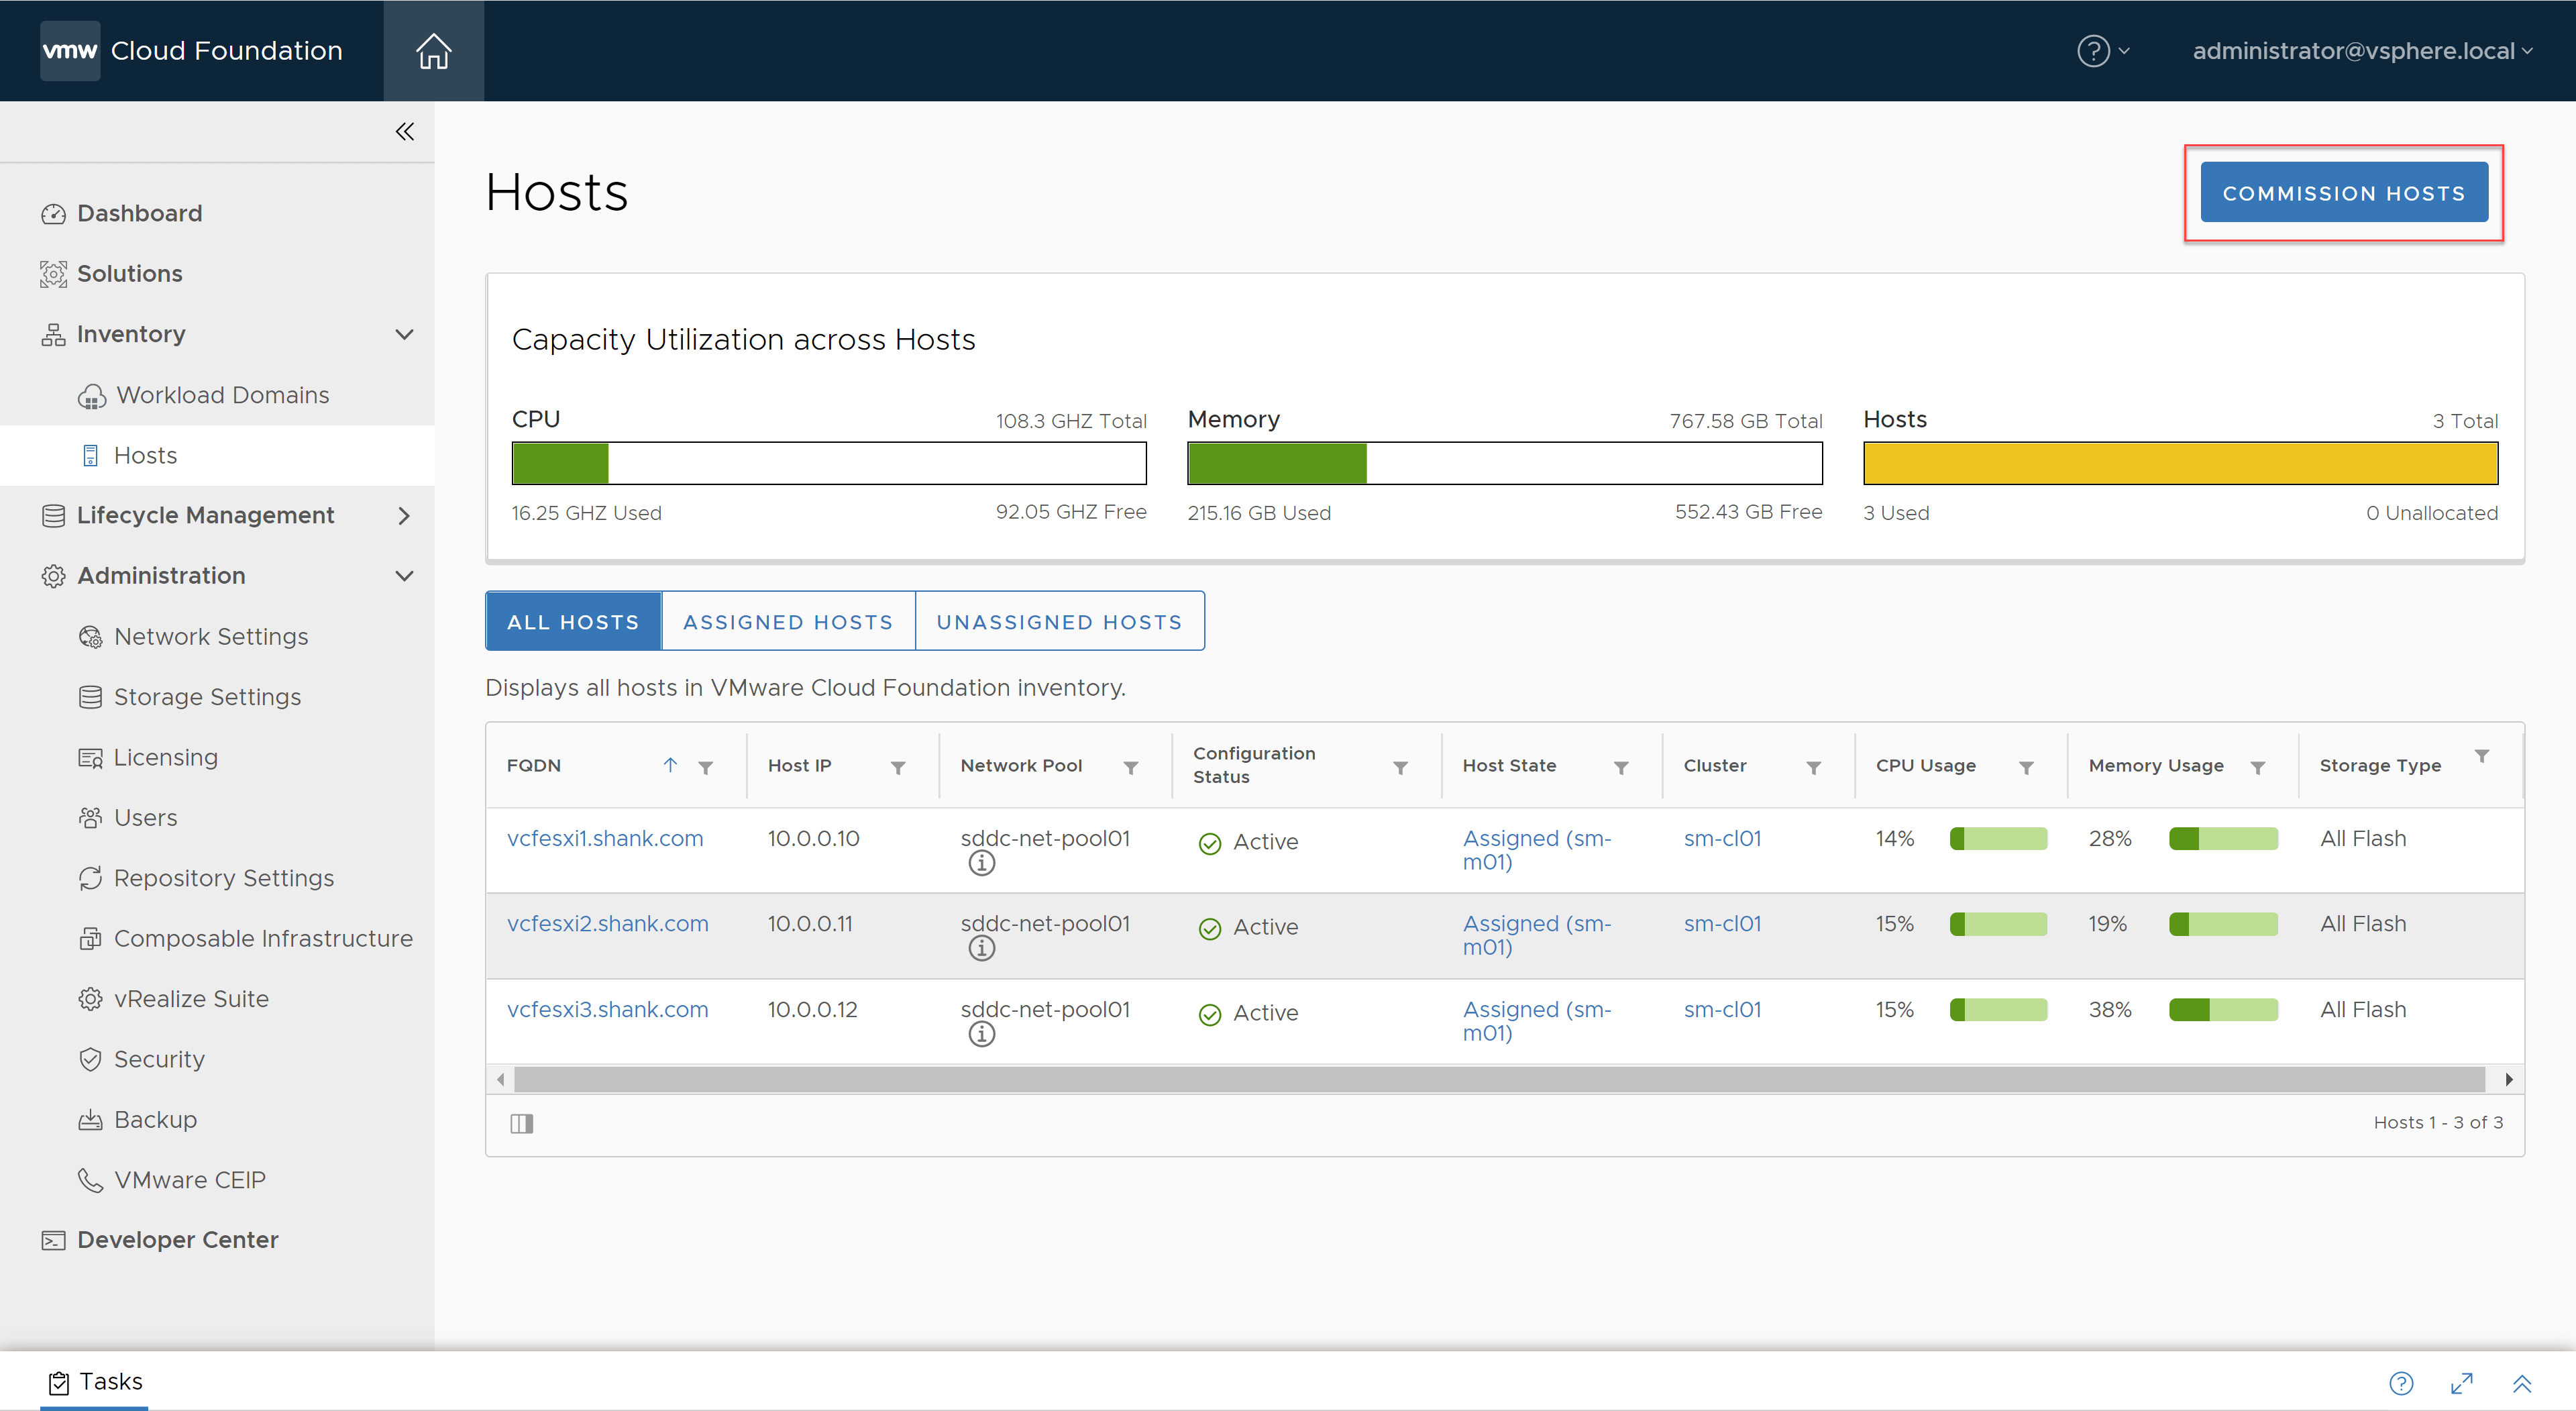
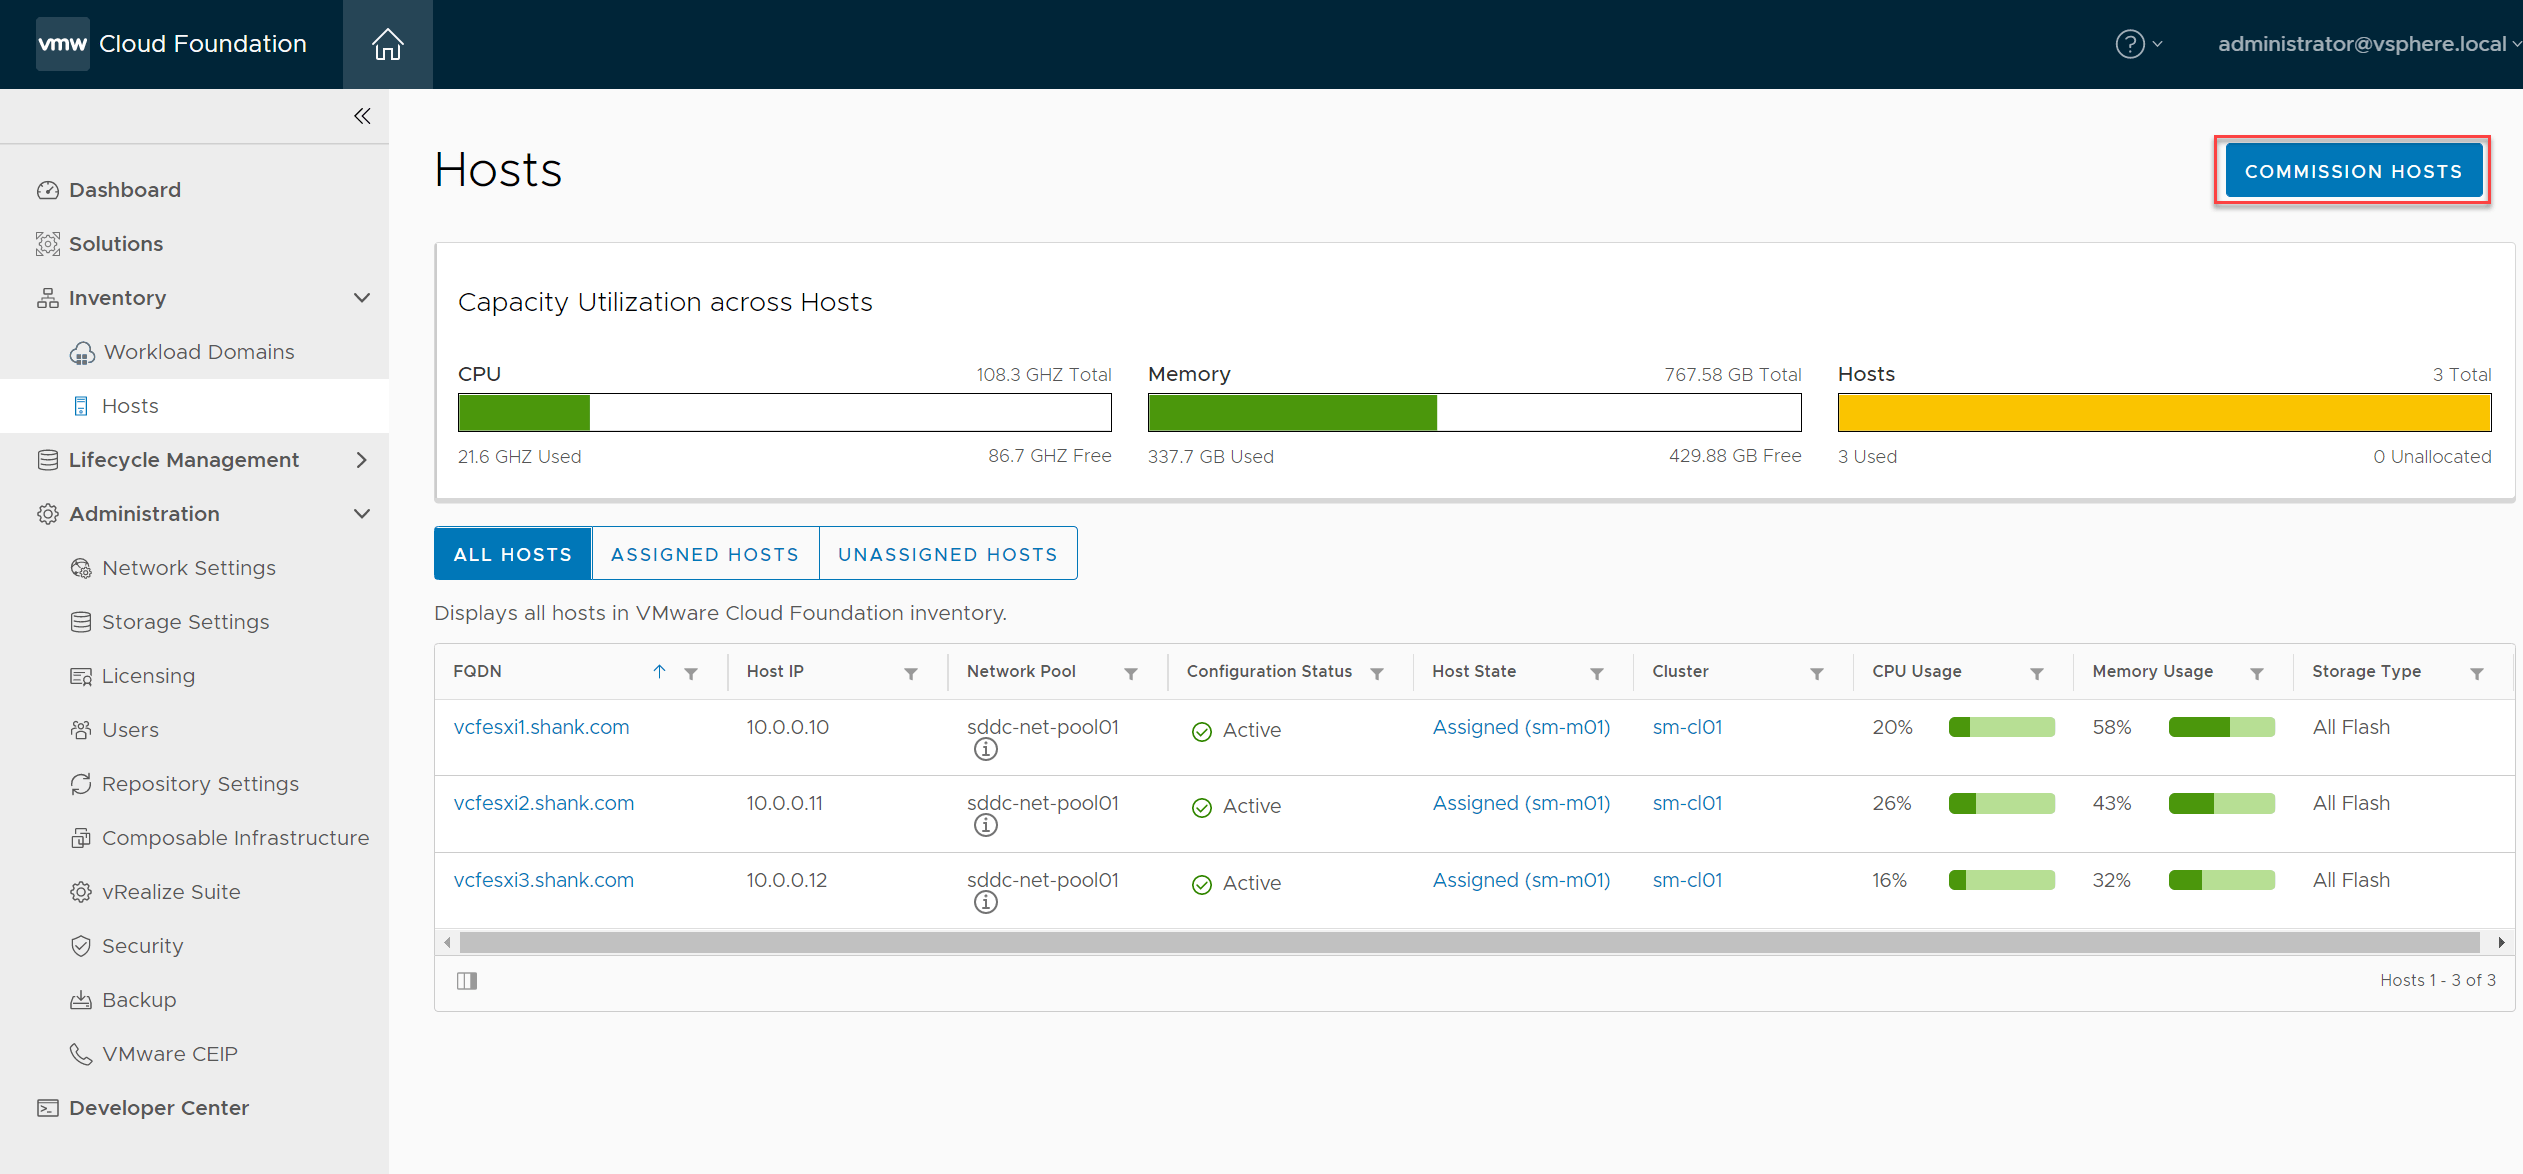
Navigate to SDDC Manager -> Inventory -> Hosts -> Commission Host.
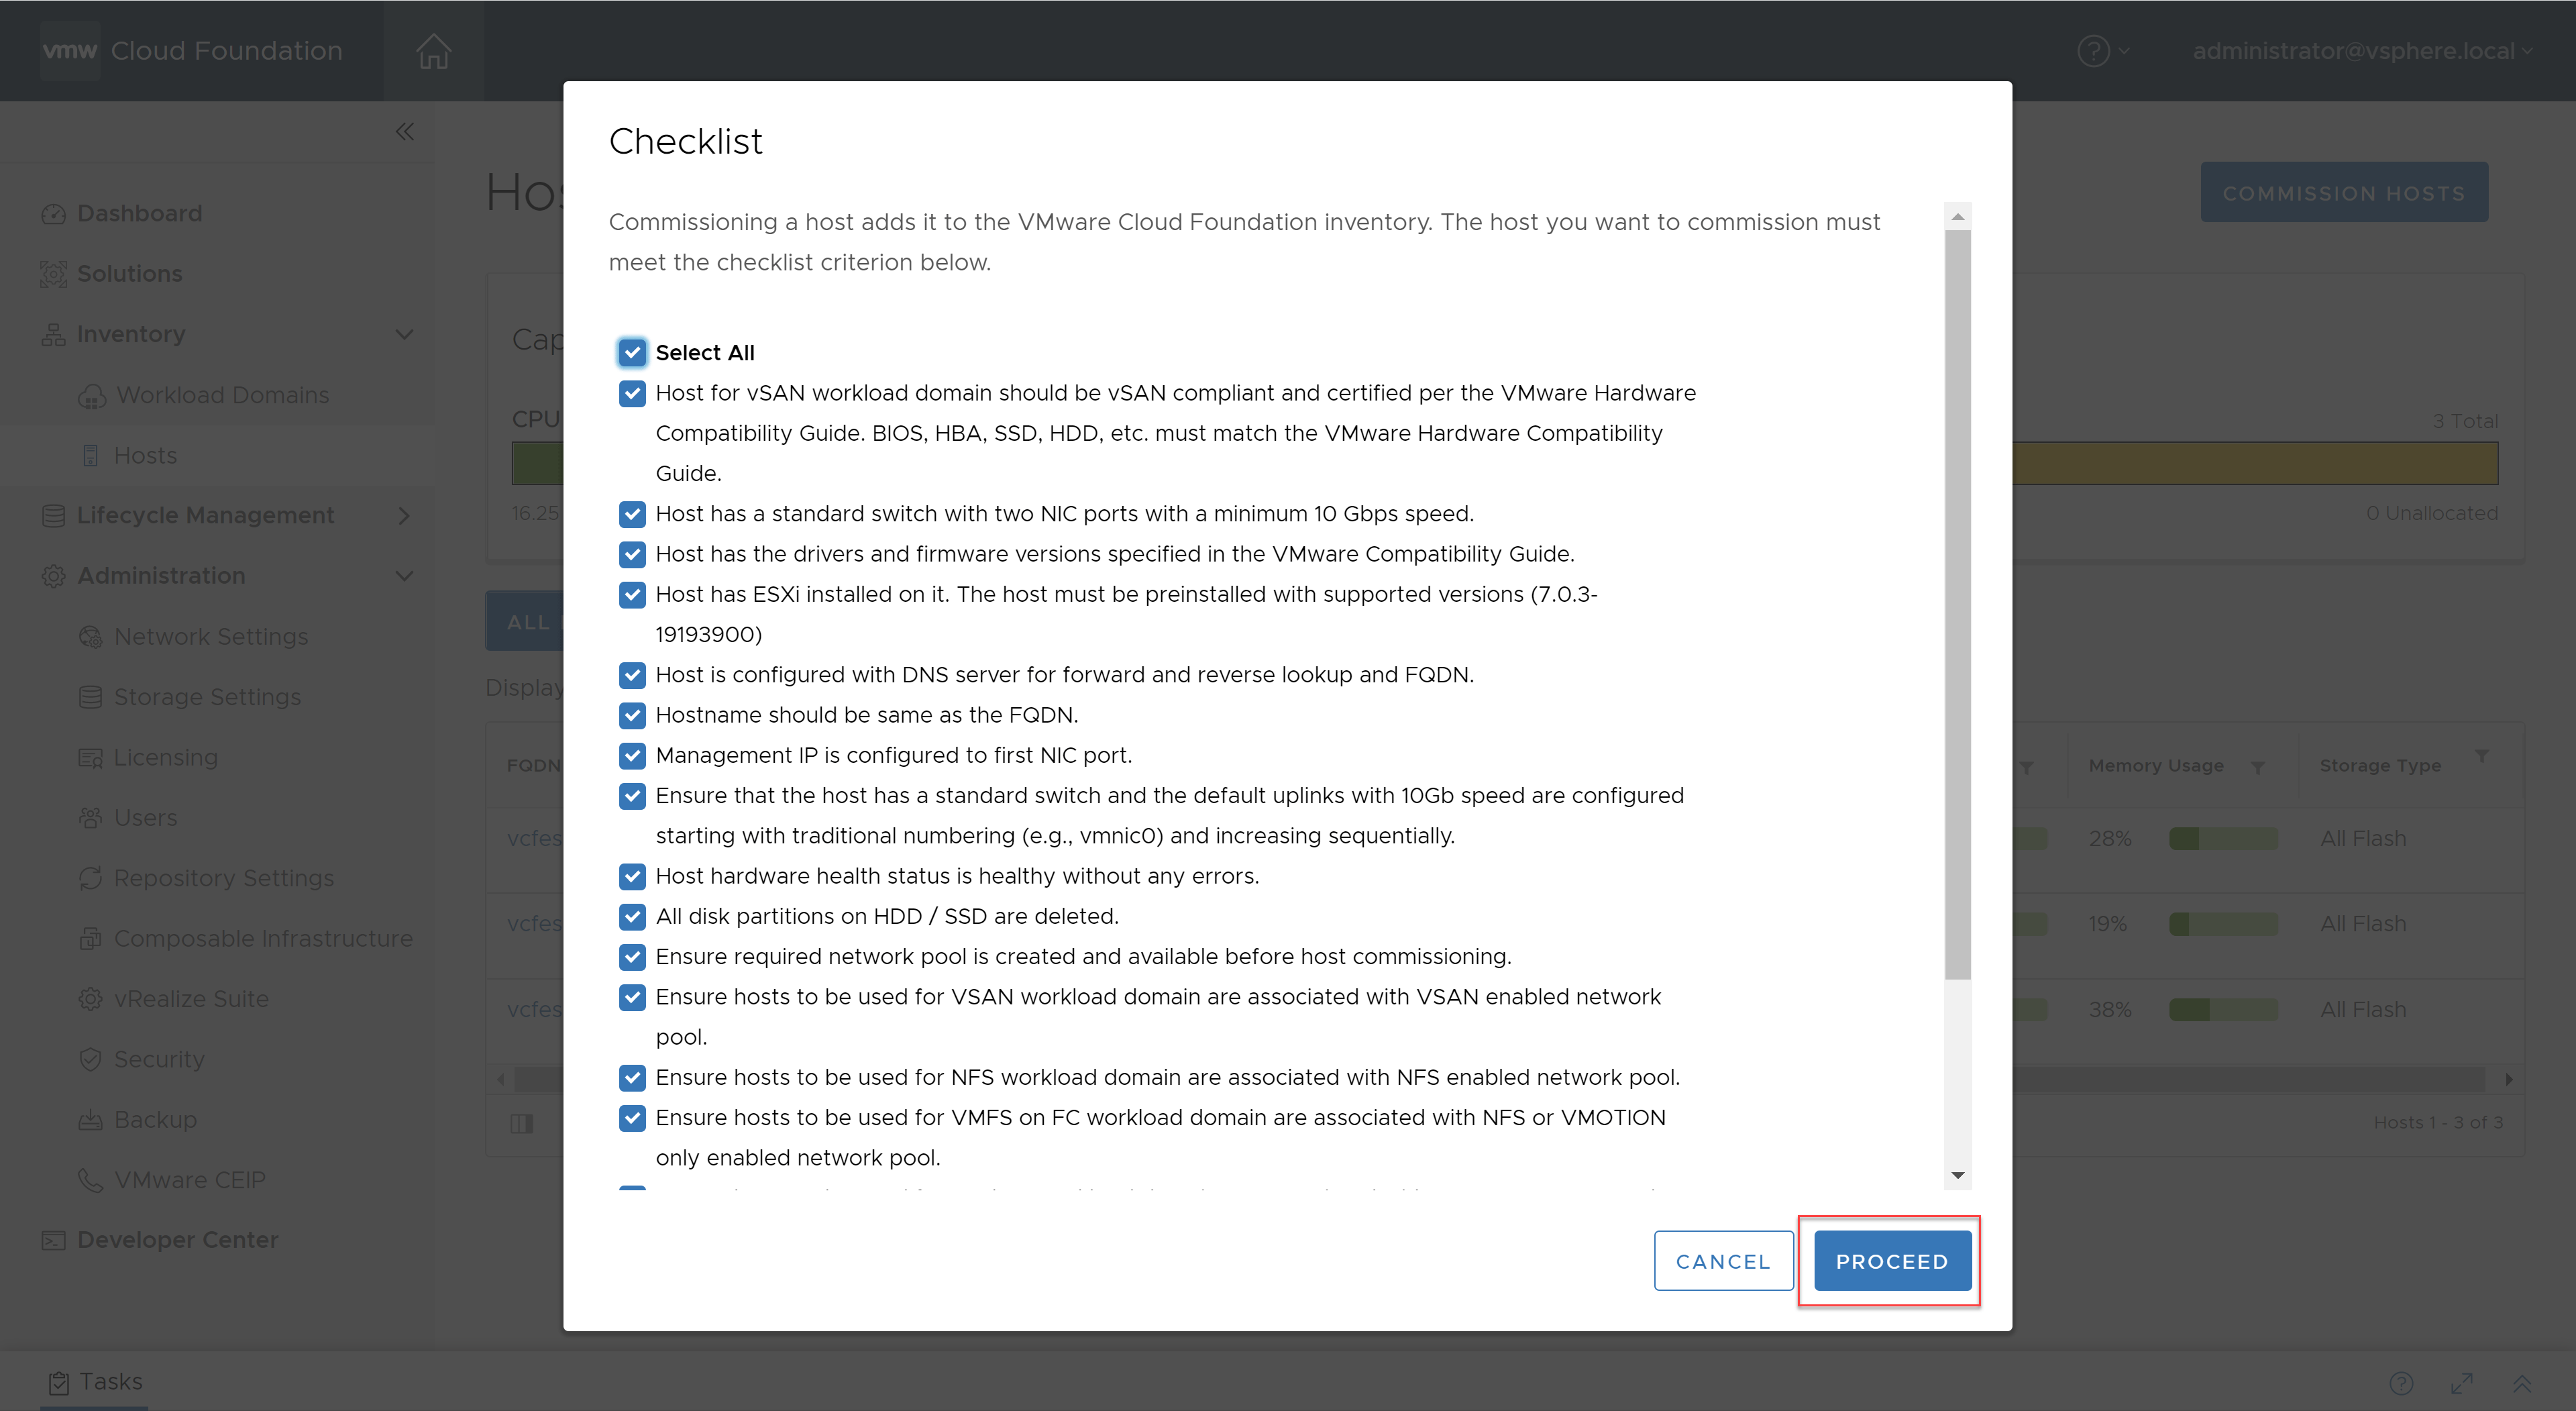
On the next screen, check Select All, as long as everything checks out in your environment.
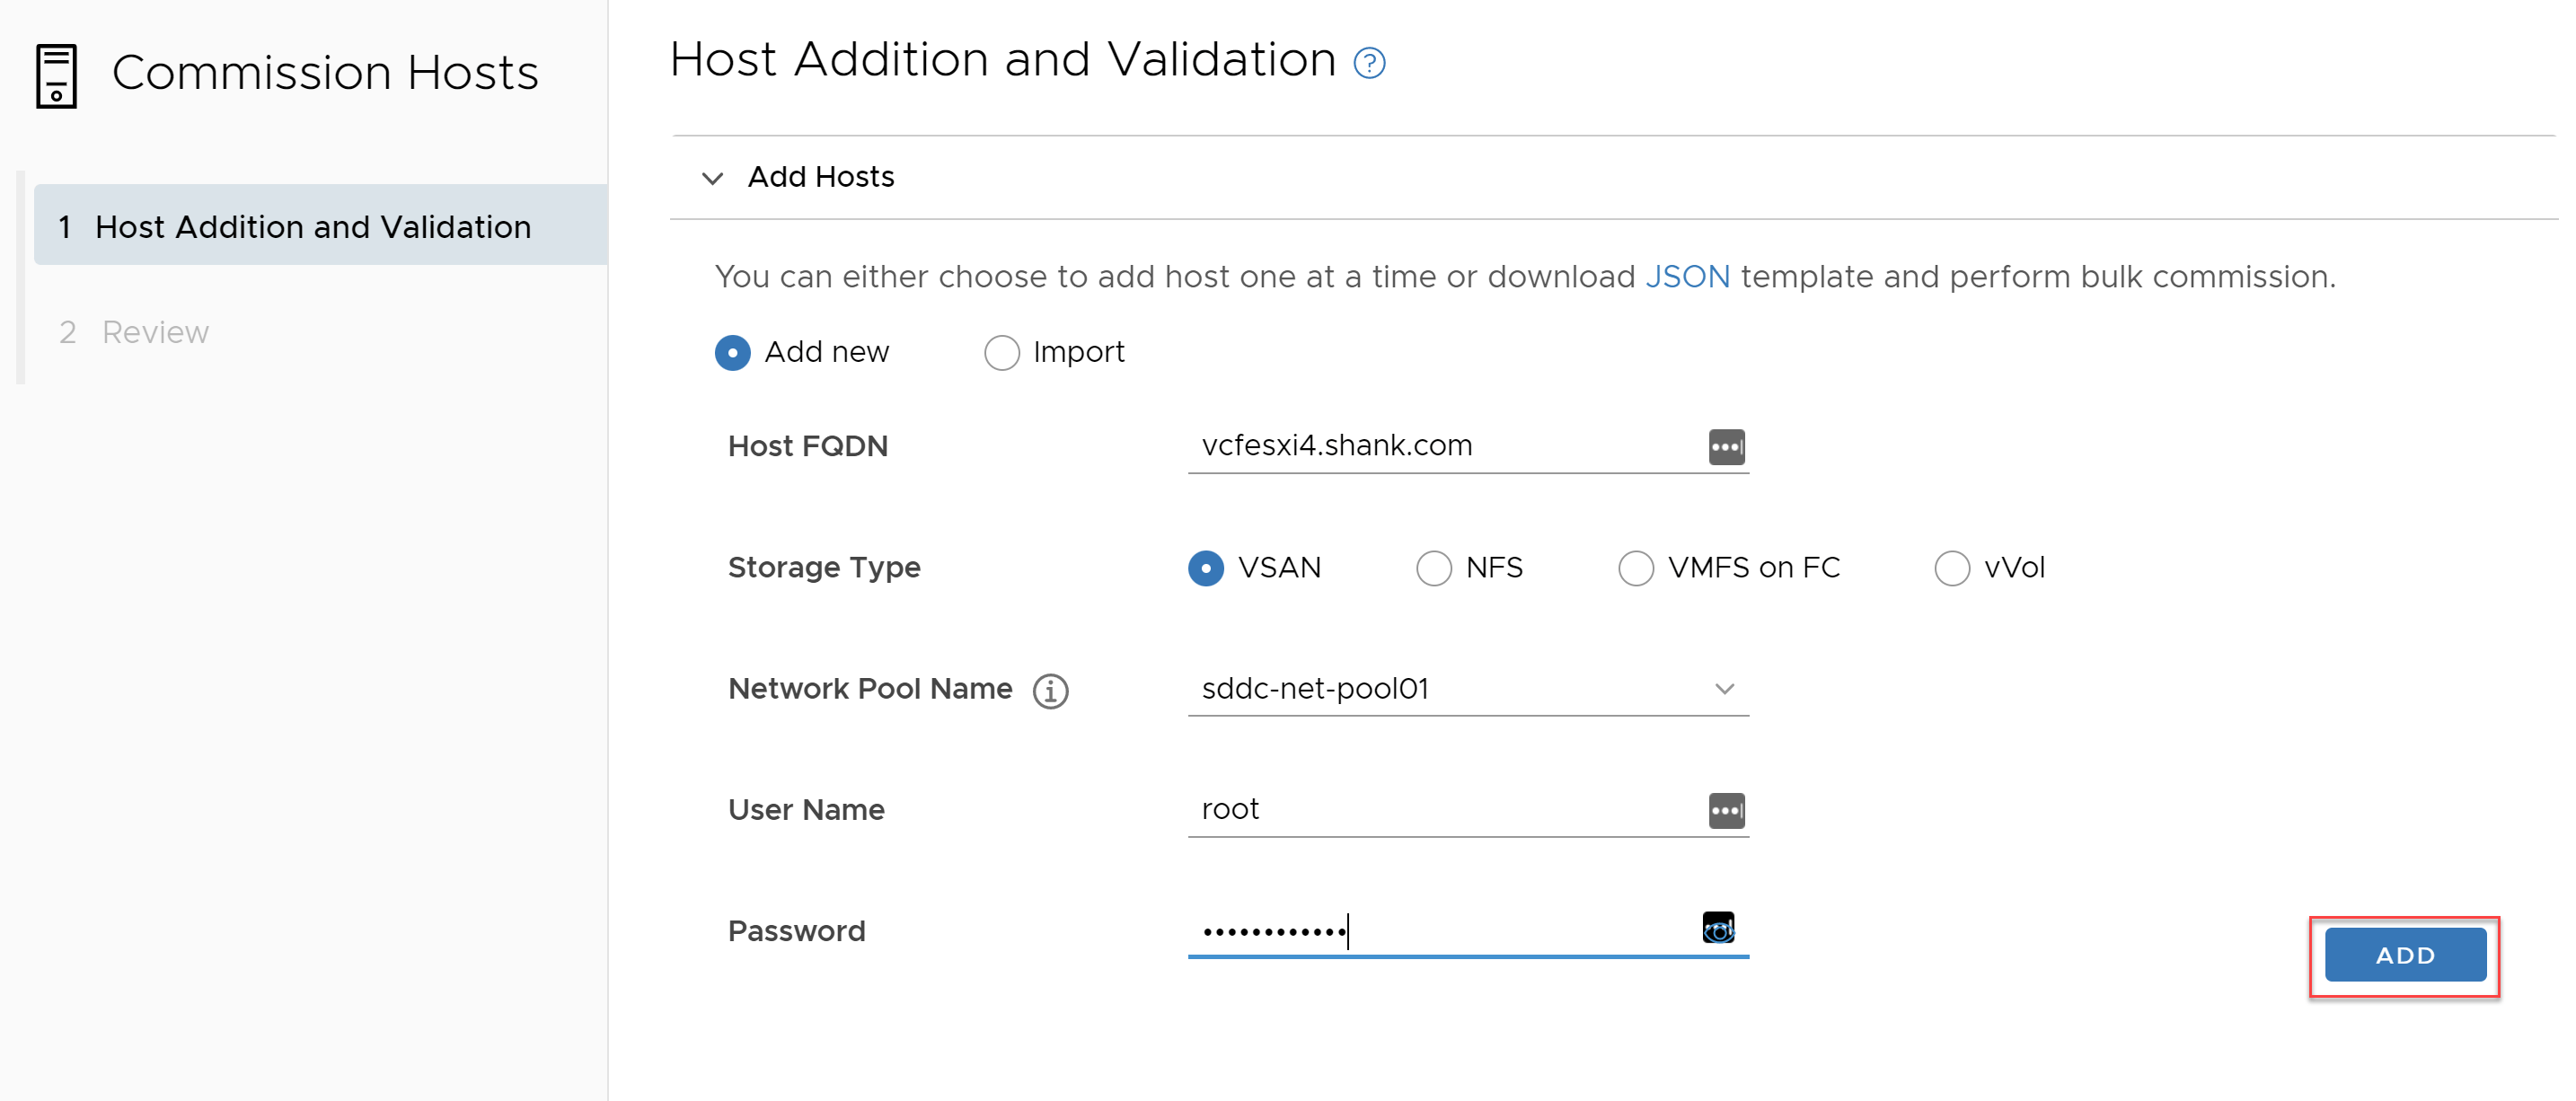
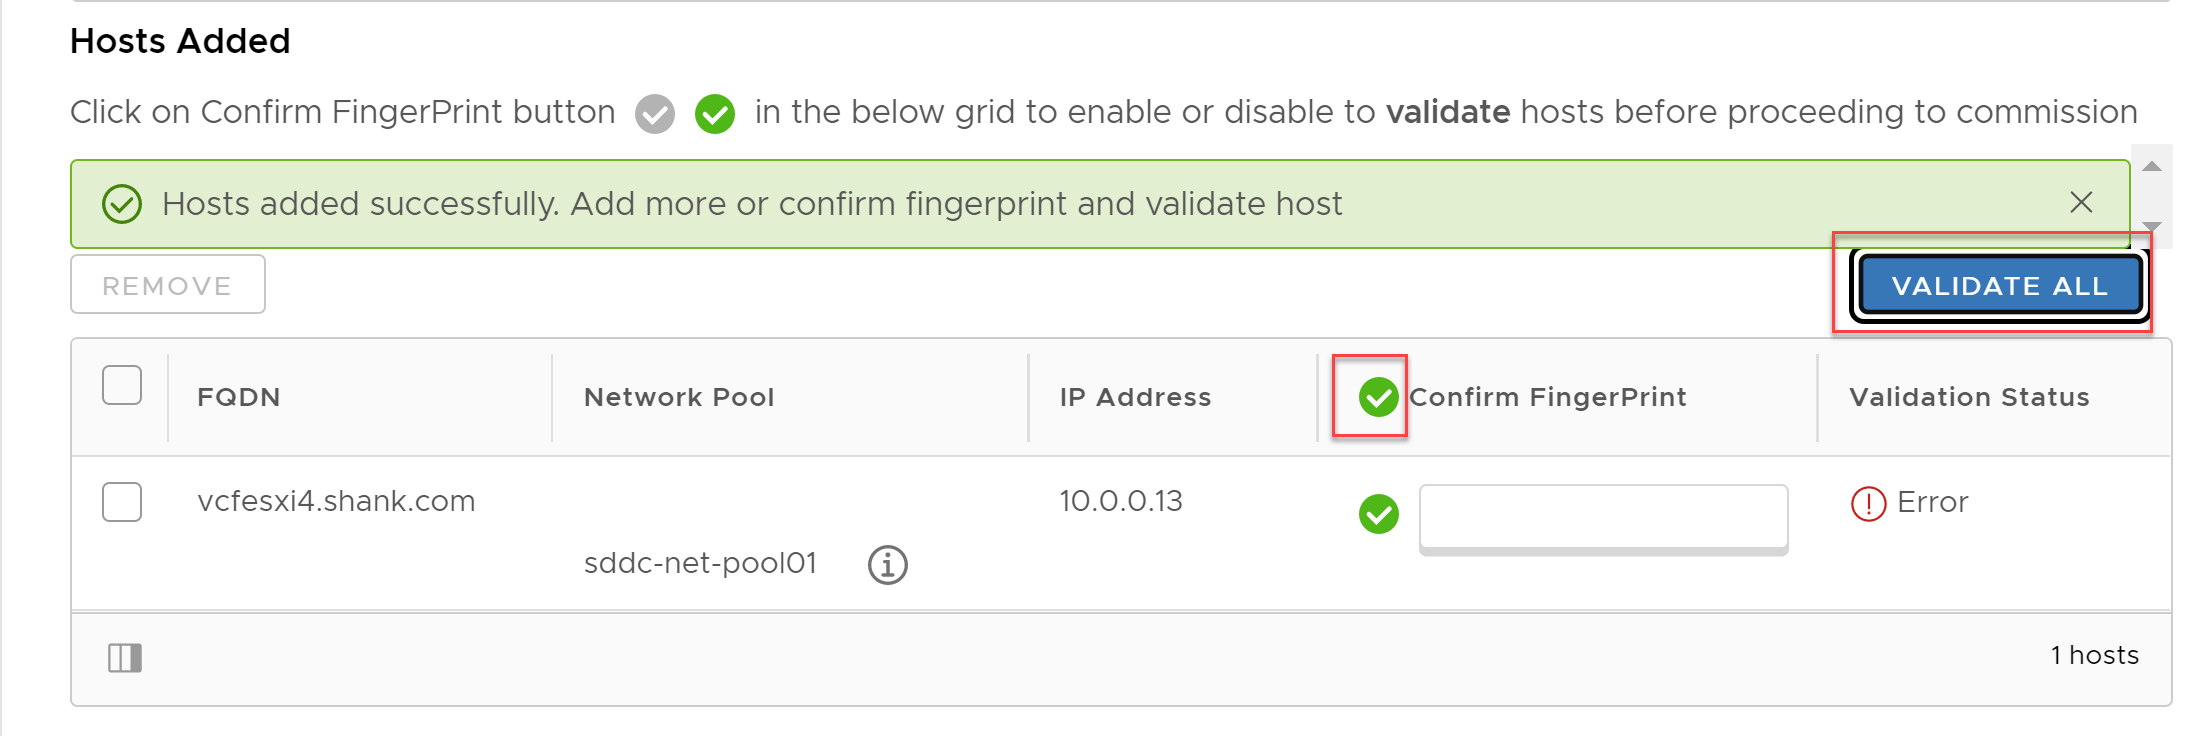
Populate the details relevant to the host you are adding, selecting the correct network pool, then click on add.
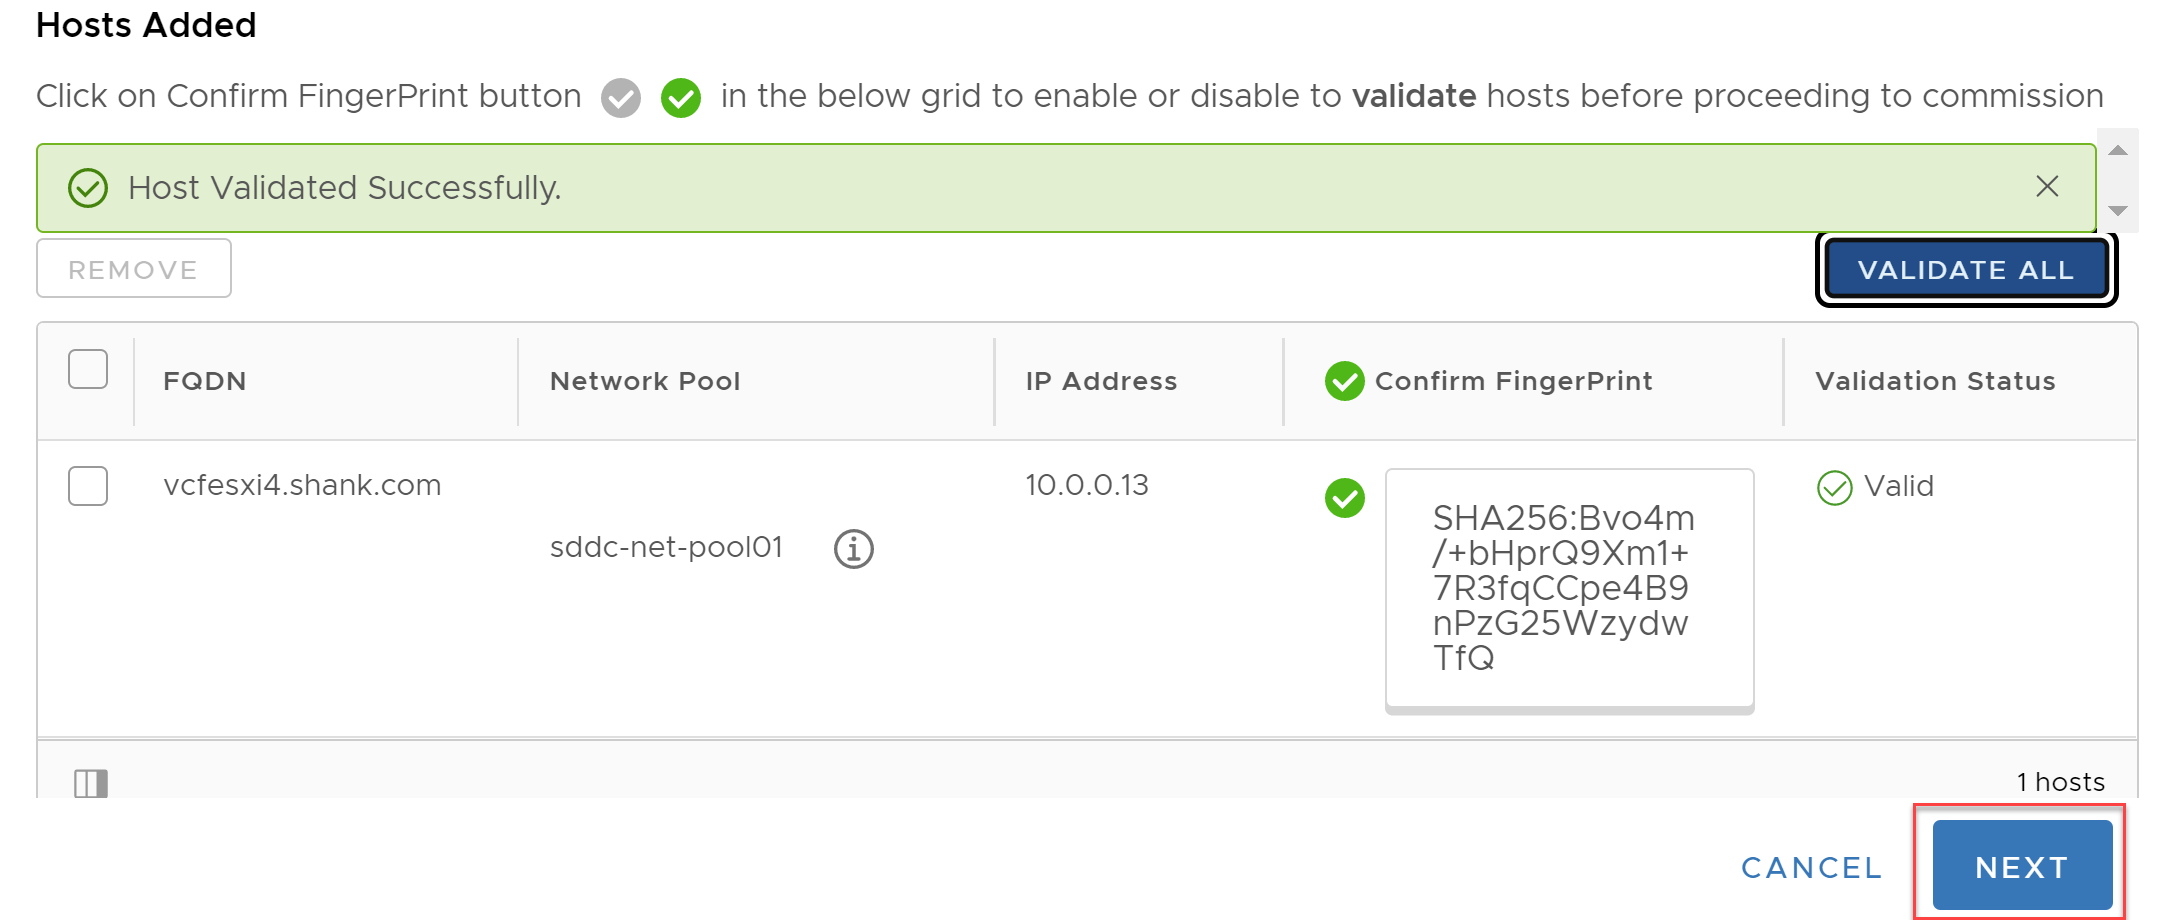
Select the check mark next to confirm fingerprint and then click on validate all.
Once the validation is successful, click next.
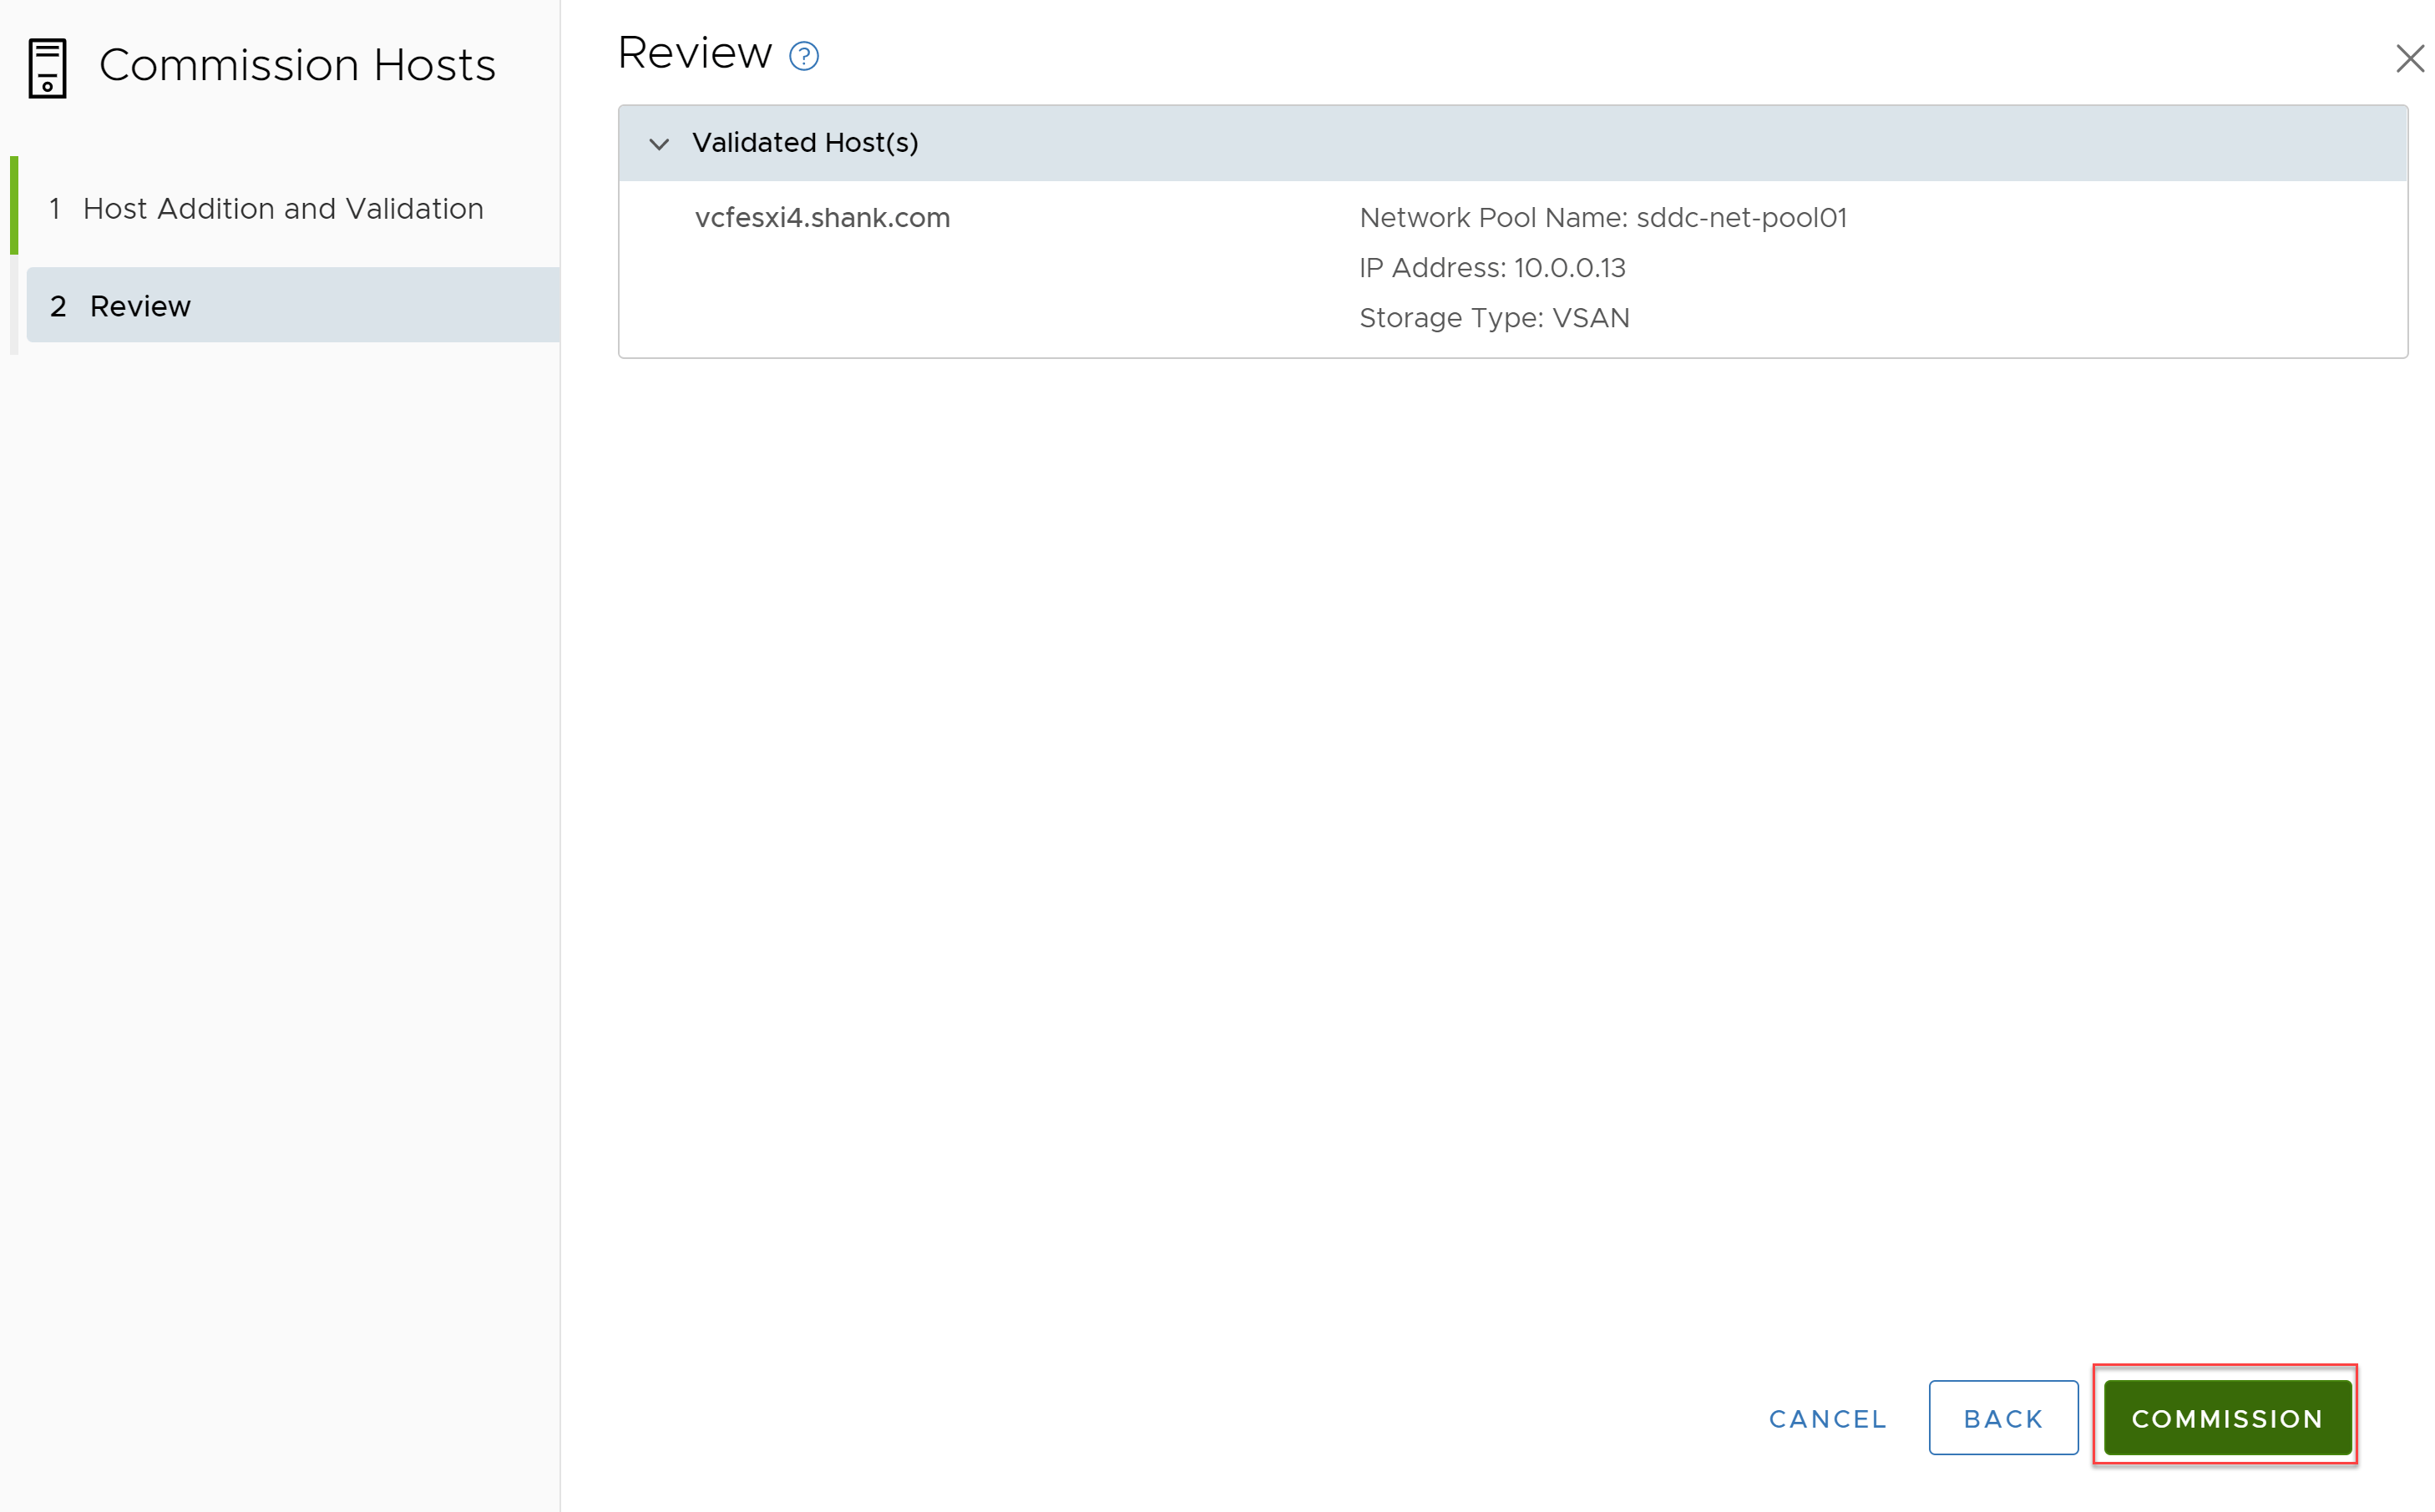
On the final screen, click commission.
Step 3: Add the host to the Management Domain
This section will highlight the procedure to add the host back into the Management Domain using API. The reason I have used API is due to the host using custom NICs. Ordinarily, you would use vmnic0 and vmnic1, however in this case the host will need to use vmnic4 and vmnic5. The following steps detail this approach.
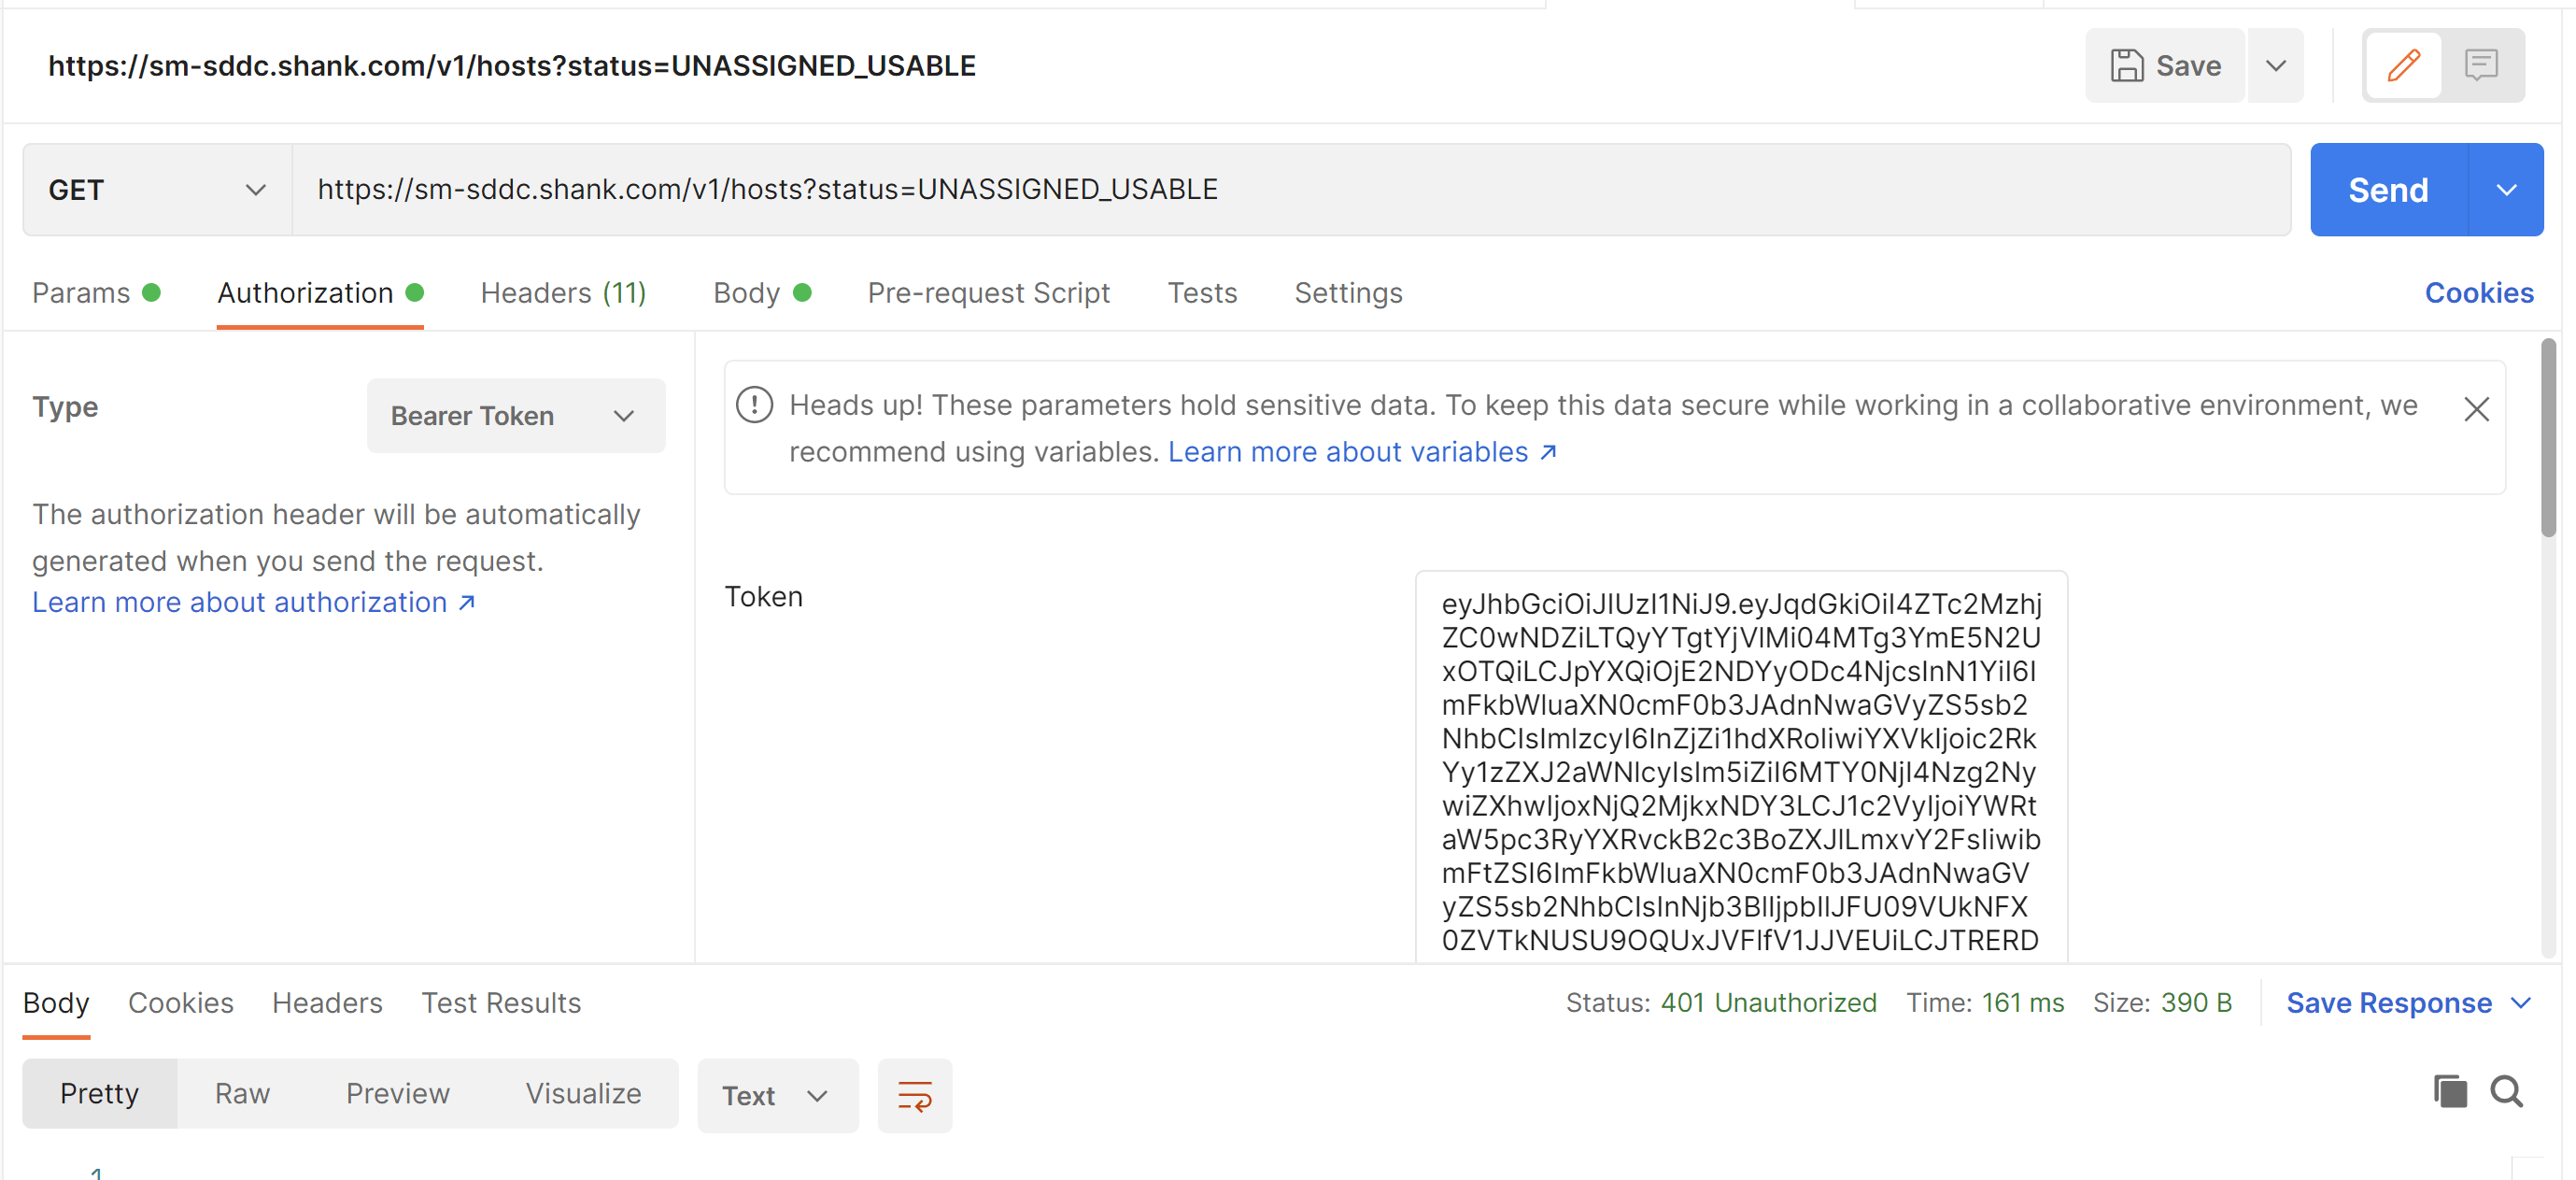
Step 3a: Generate a bearer token
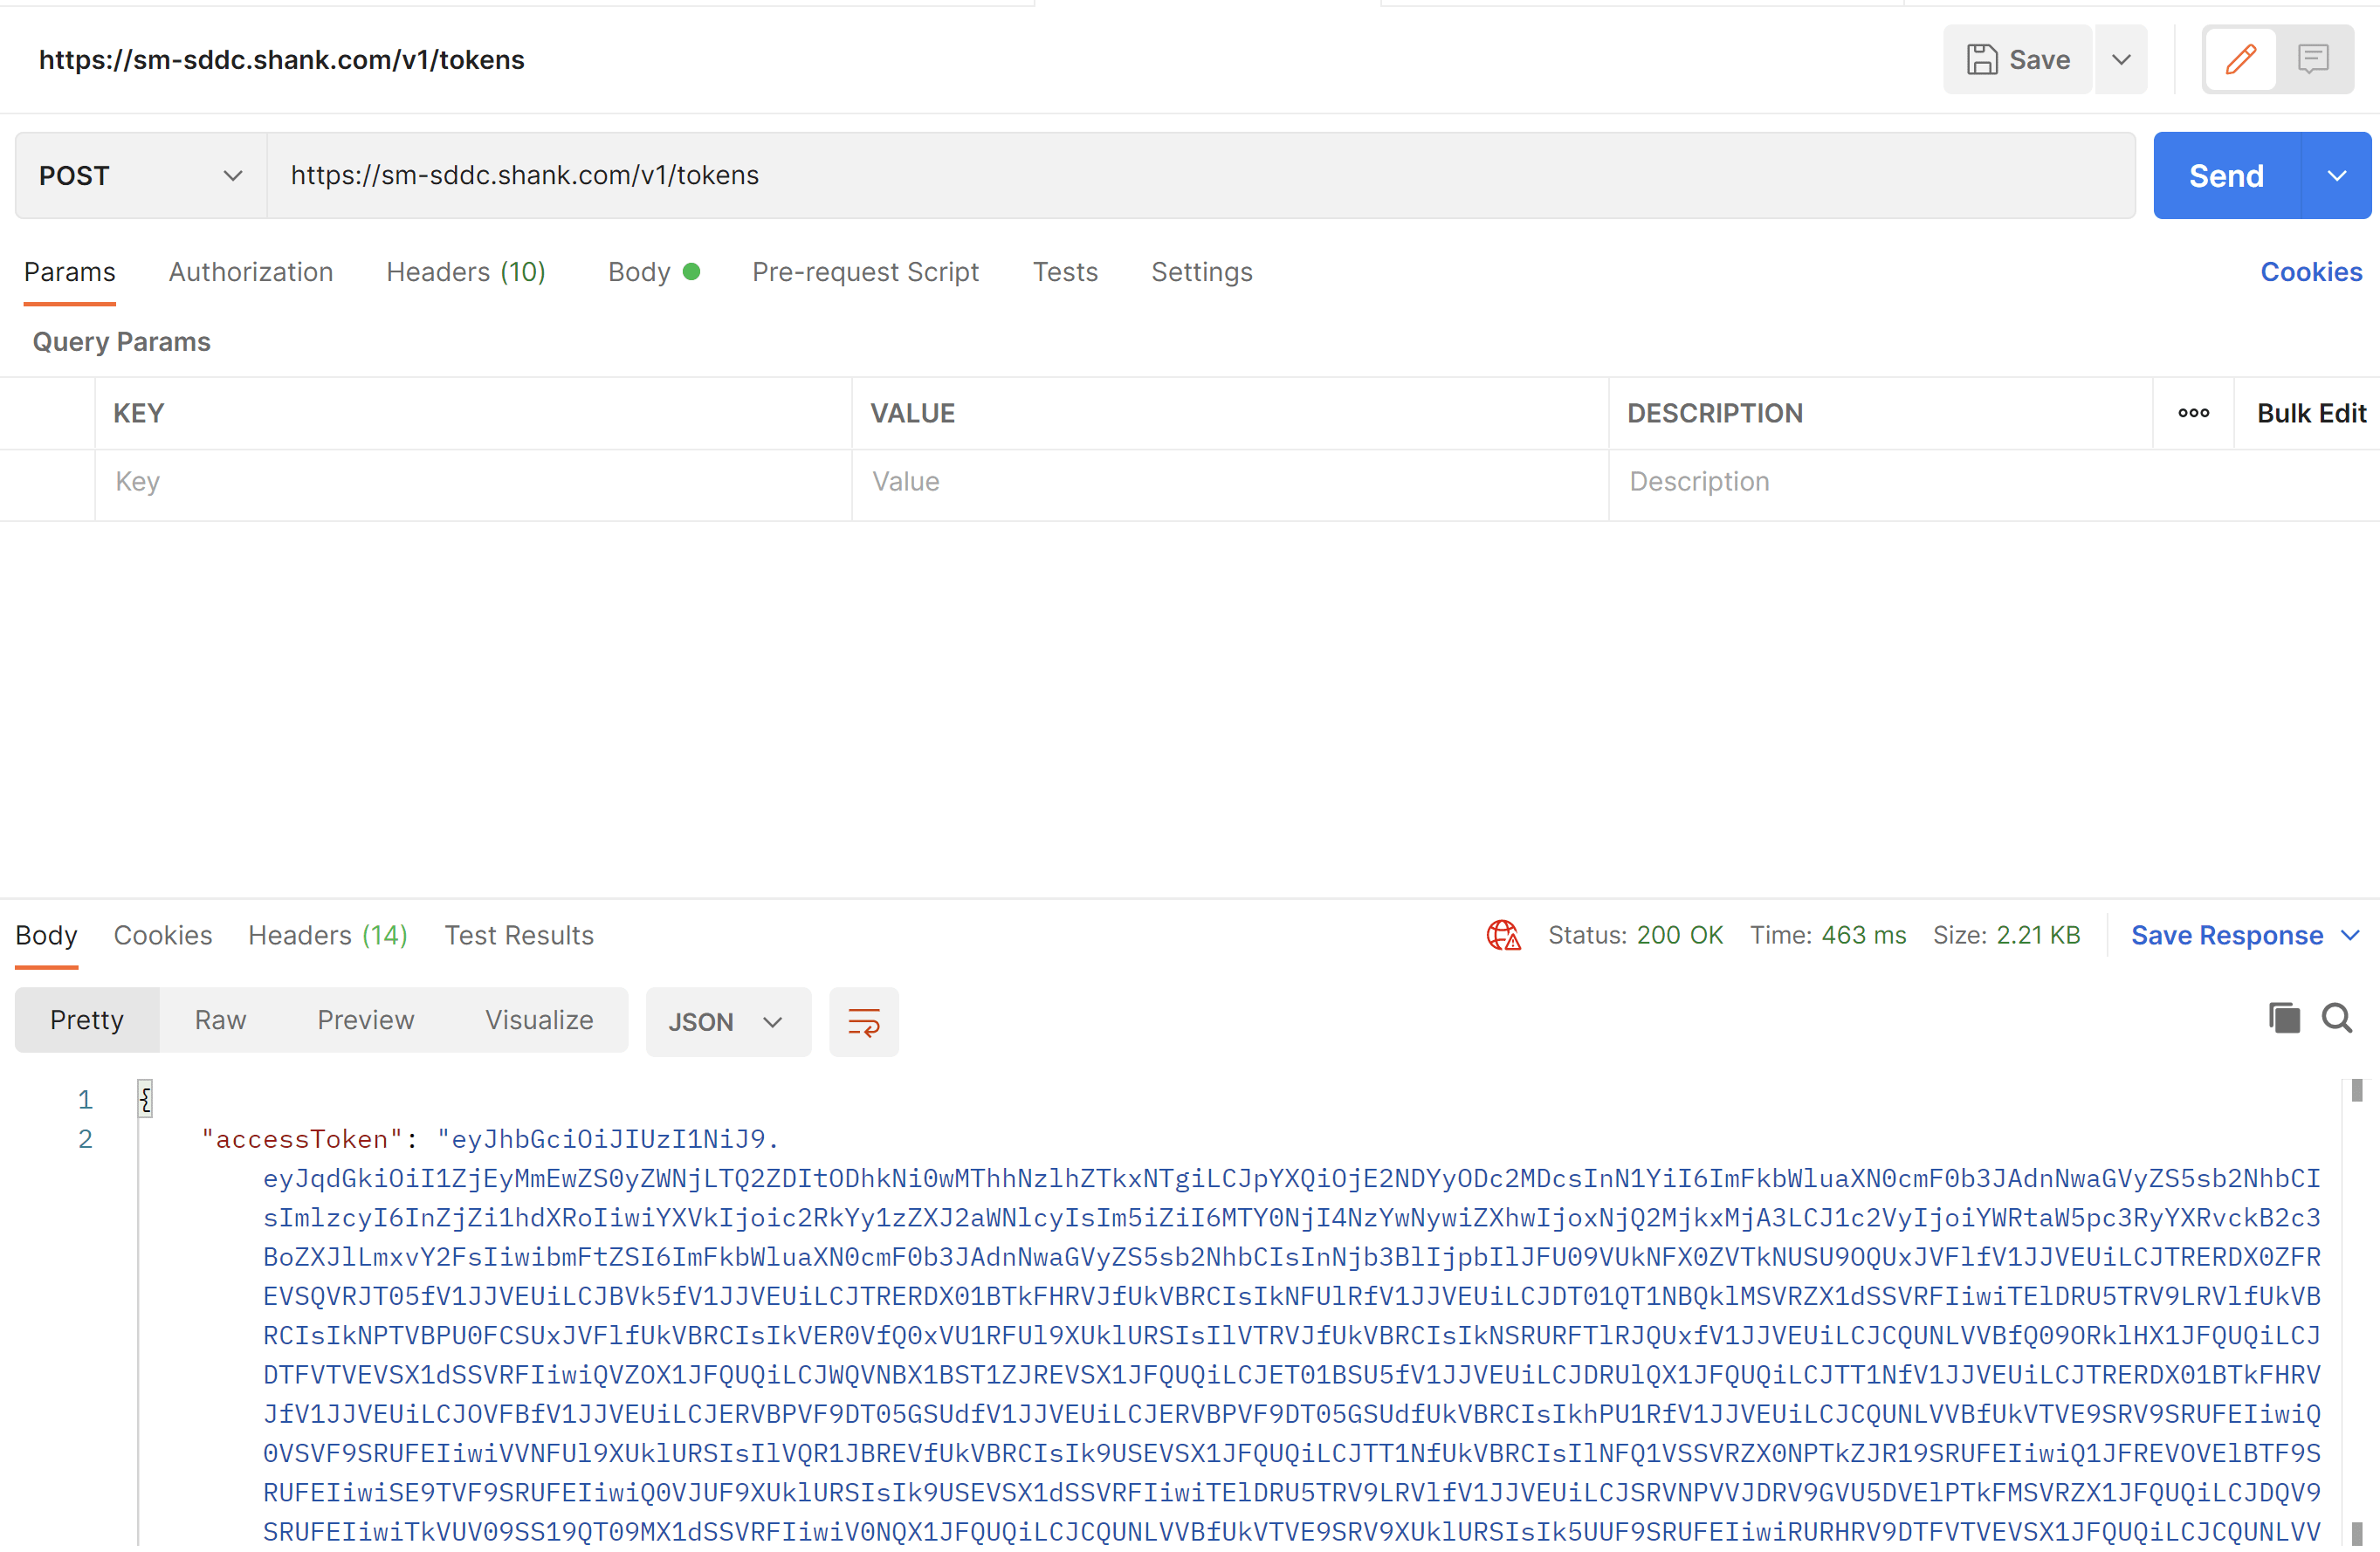
The code below can be used to generate a bearer token, change the details to suit your environment.
curl --location --request POST 'https://sddcmanager.vcf.shank.com/v1/tokens'
	--header 'Content-Type: application/json'
	--header 'Accept: application/json'
	--data-raw '{
	  "username" : "[email protected]",
	  "password" : "VMware123!"
}'
In this guide, I have used postman to generate the token, as can be seen below.
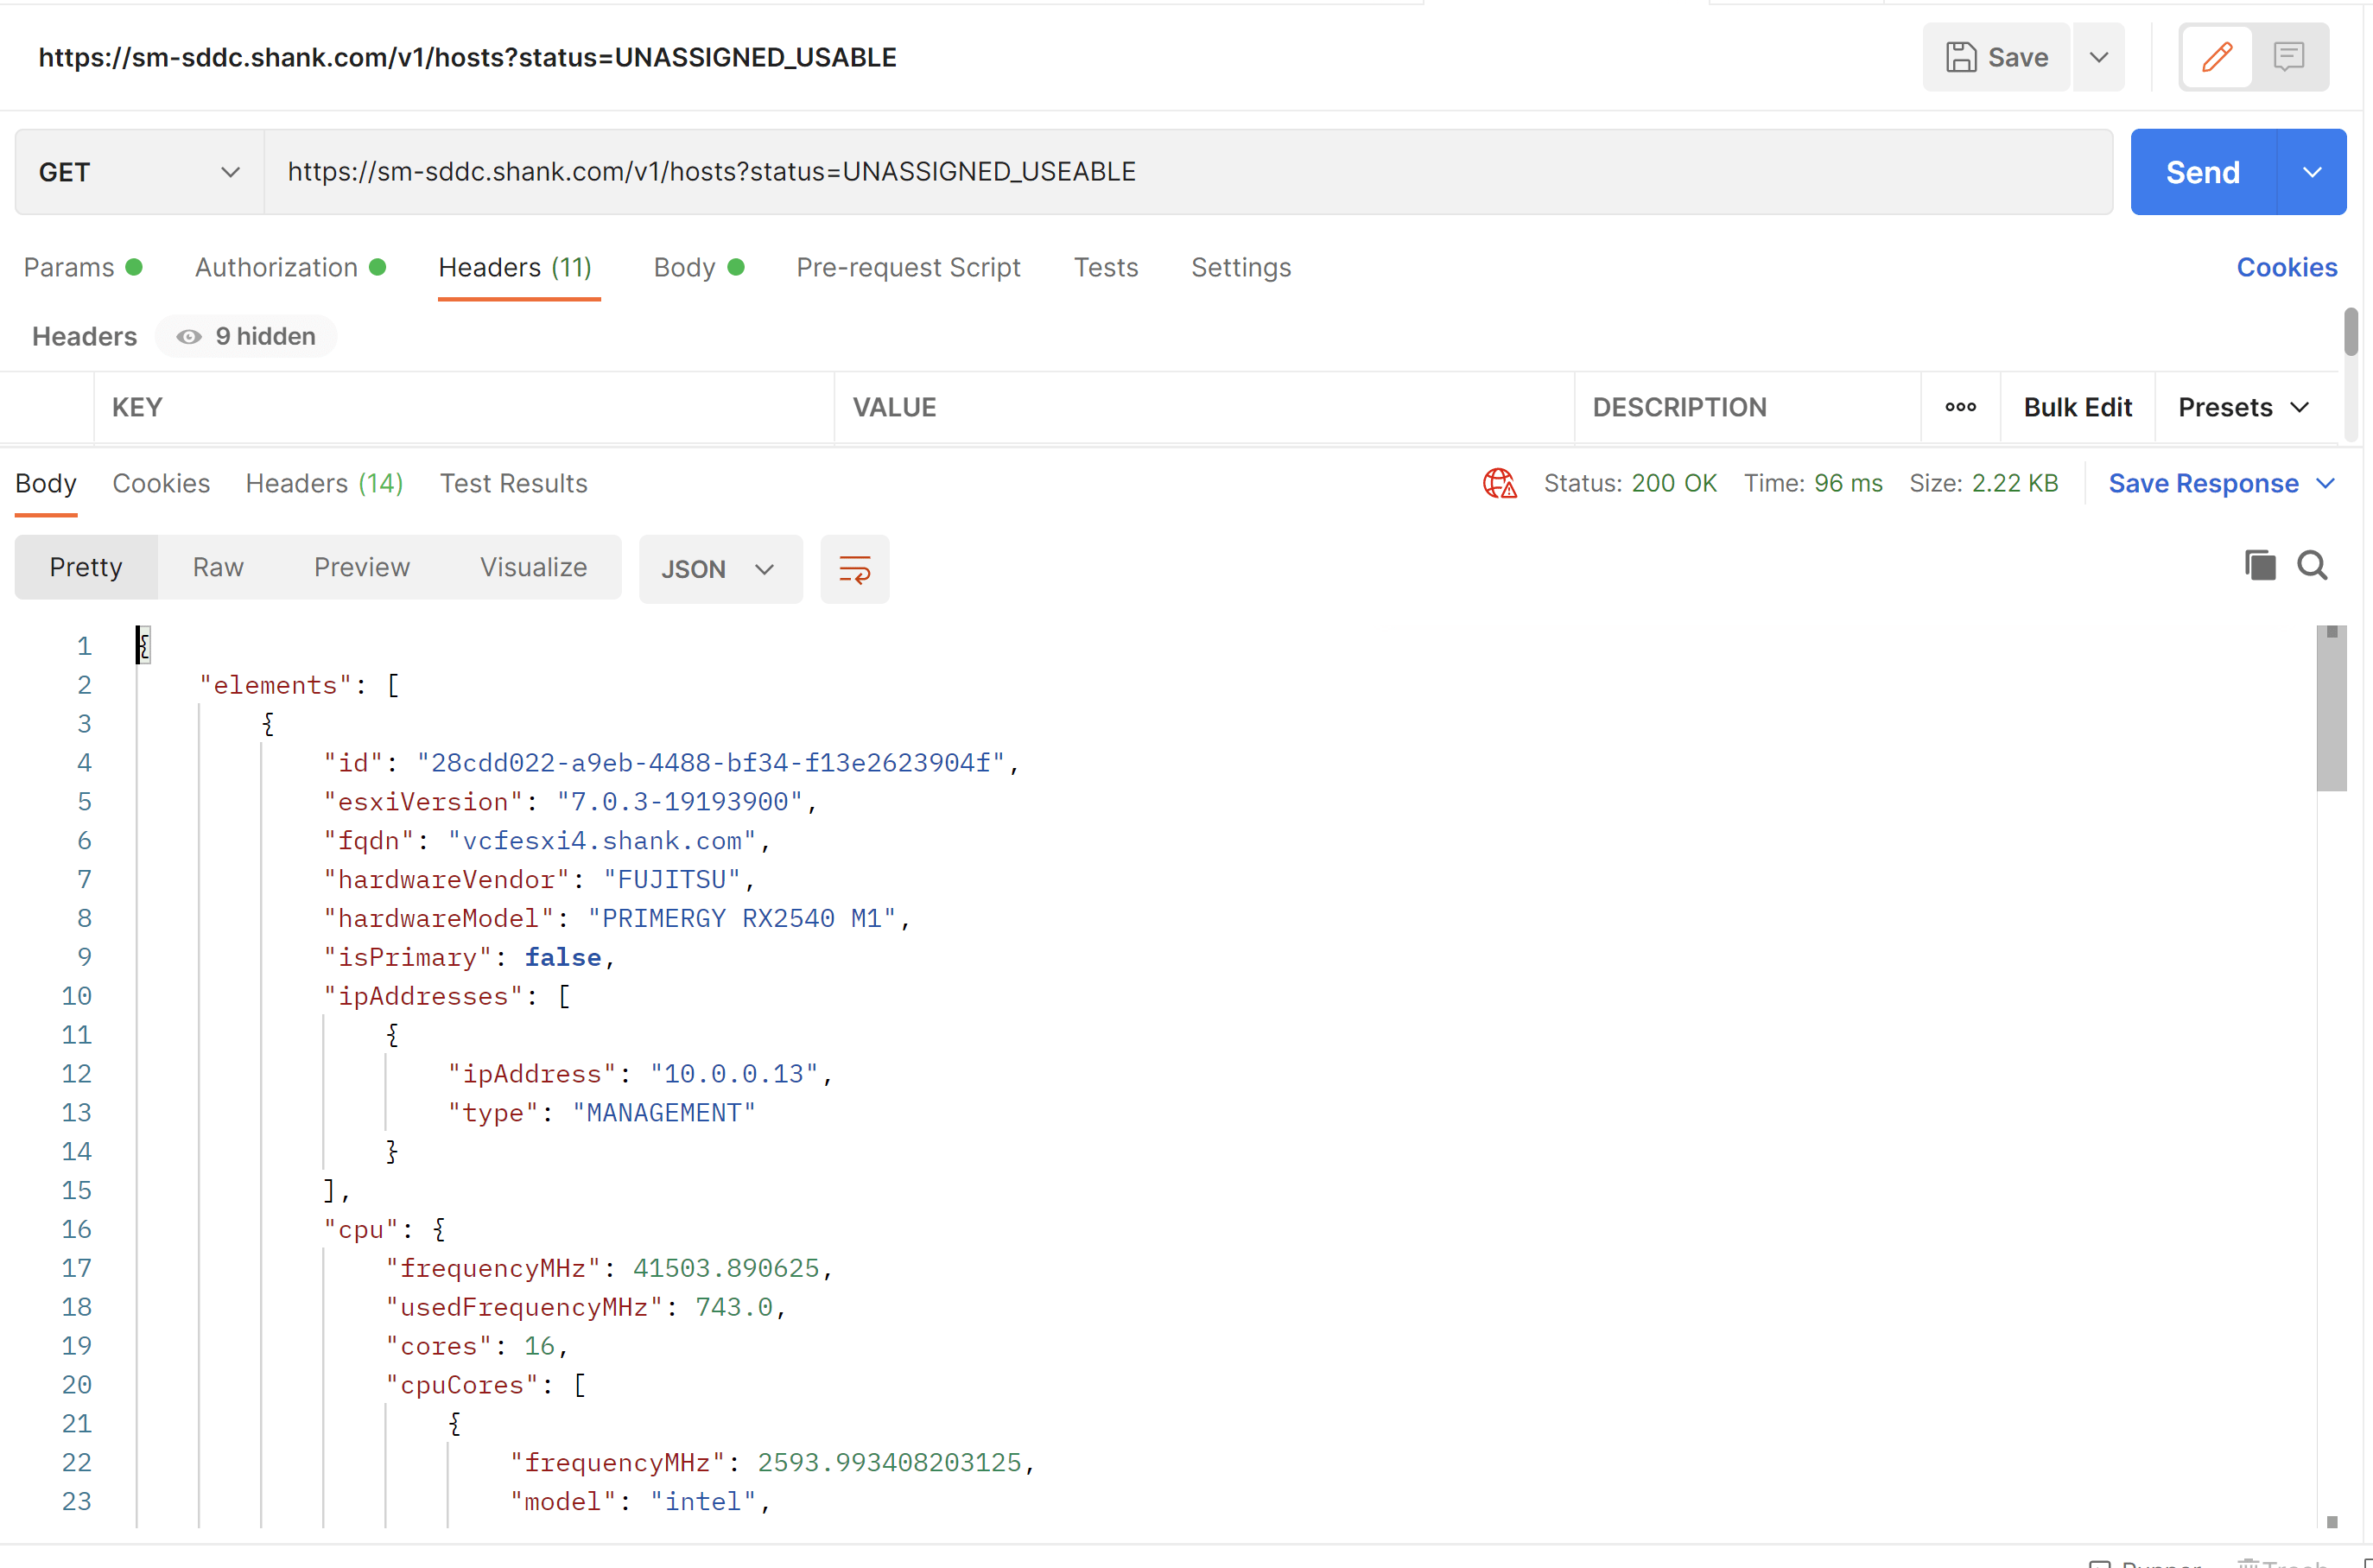
Step 3b: Find Unassigned Usable Hosts
To add the host back into the Management Domain, you must first obtain the hosts ID. Using the bearer token generated in the previous step, issue the GET command in the images below to get identify the host. The host ID is labelled “id”.
Step 4: Add the host to the Management Domain
The example JSON below can be used to add the host identified in the previous step into the Management Domain. Update the details relevant for your environment; use the id obtained from the earlier step, the vDS name that the current hosts are attached to, and the vmnics you wish to use.
{
    "clusterExpansionSpec": {
        "interRackExpansion": false,
        "hostSpecs": [{
           "id": "28cdd022-a9eb-4488-bf34-f13e2623904f",
           "licensekey": "xxx",
           "username": "root",
           "hostNetworkSpec": {
               "vmNics": [{
                   "id": "vmnic4",
                   "vdsName": "vds01"
               }, {
                   "id": "vmnic5",
                   "vdsName": "vds01"
               }]
           }
       }]
   }
}
Next, you will need to get the ID of the cluster you want to add the host to, one method is listed here (about 3/4 of the way down).
Step 4a: Validate Host Spec
Before you can add the host to the domain, you must first populate the JSON with all the correct details, and validate it using SDDC Managers API.
The code below is what I used to validate the host in this example. Ensure you paste in your bearer token.
curl --location --request POST 'https://sm-sddc.shank.com/v1/clusters/0228b8f7-eb8c-411a-93f1-7083b77ef2f1/validations' \
--header 'Authorization: Bearer insertBearerToken \
--header 'Content-Type: application/json' \
--data-raw '{
"clusterExpansionSpec": {
"interRackExpansion": false,
"hostSpecs": [{
"id": "28cdd022-a9eb-4488-bf34-f13e2623904f",
"licensekey": "xx",
"username": "root",
"hostNetworkSpec": {
"vmNics": [{
"id": "vmnic4",
"vdsName": "vds01"
}, {
"id": "vmnic5",
"vdsName": "vds01"
}]
}
}]
}
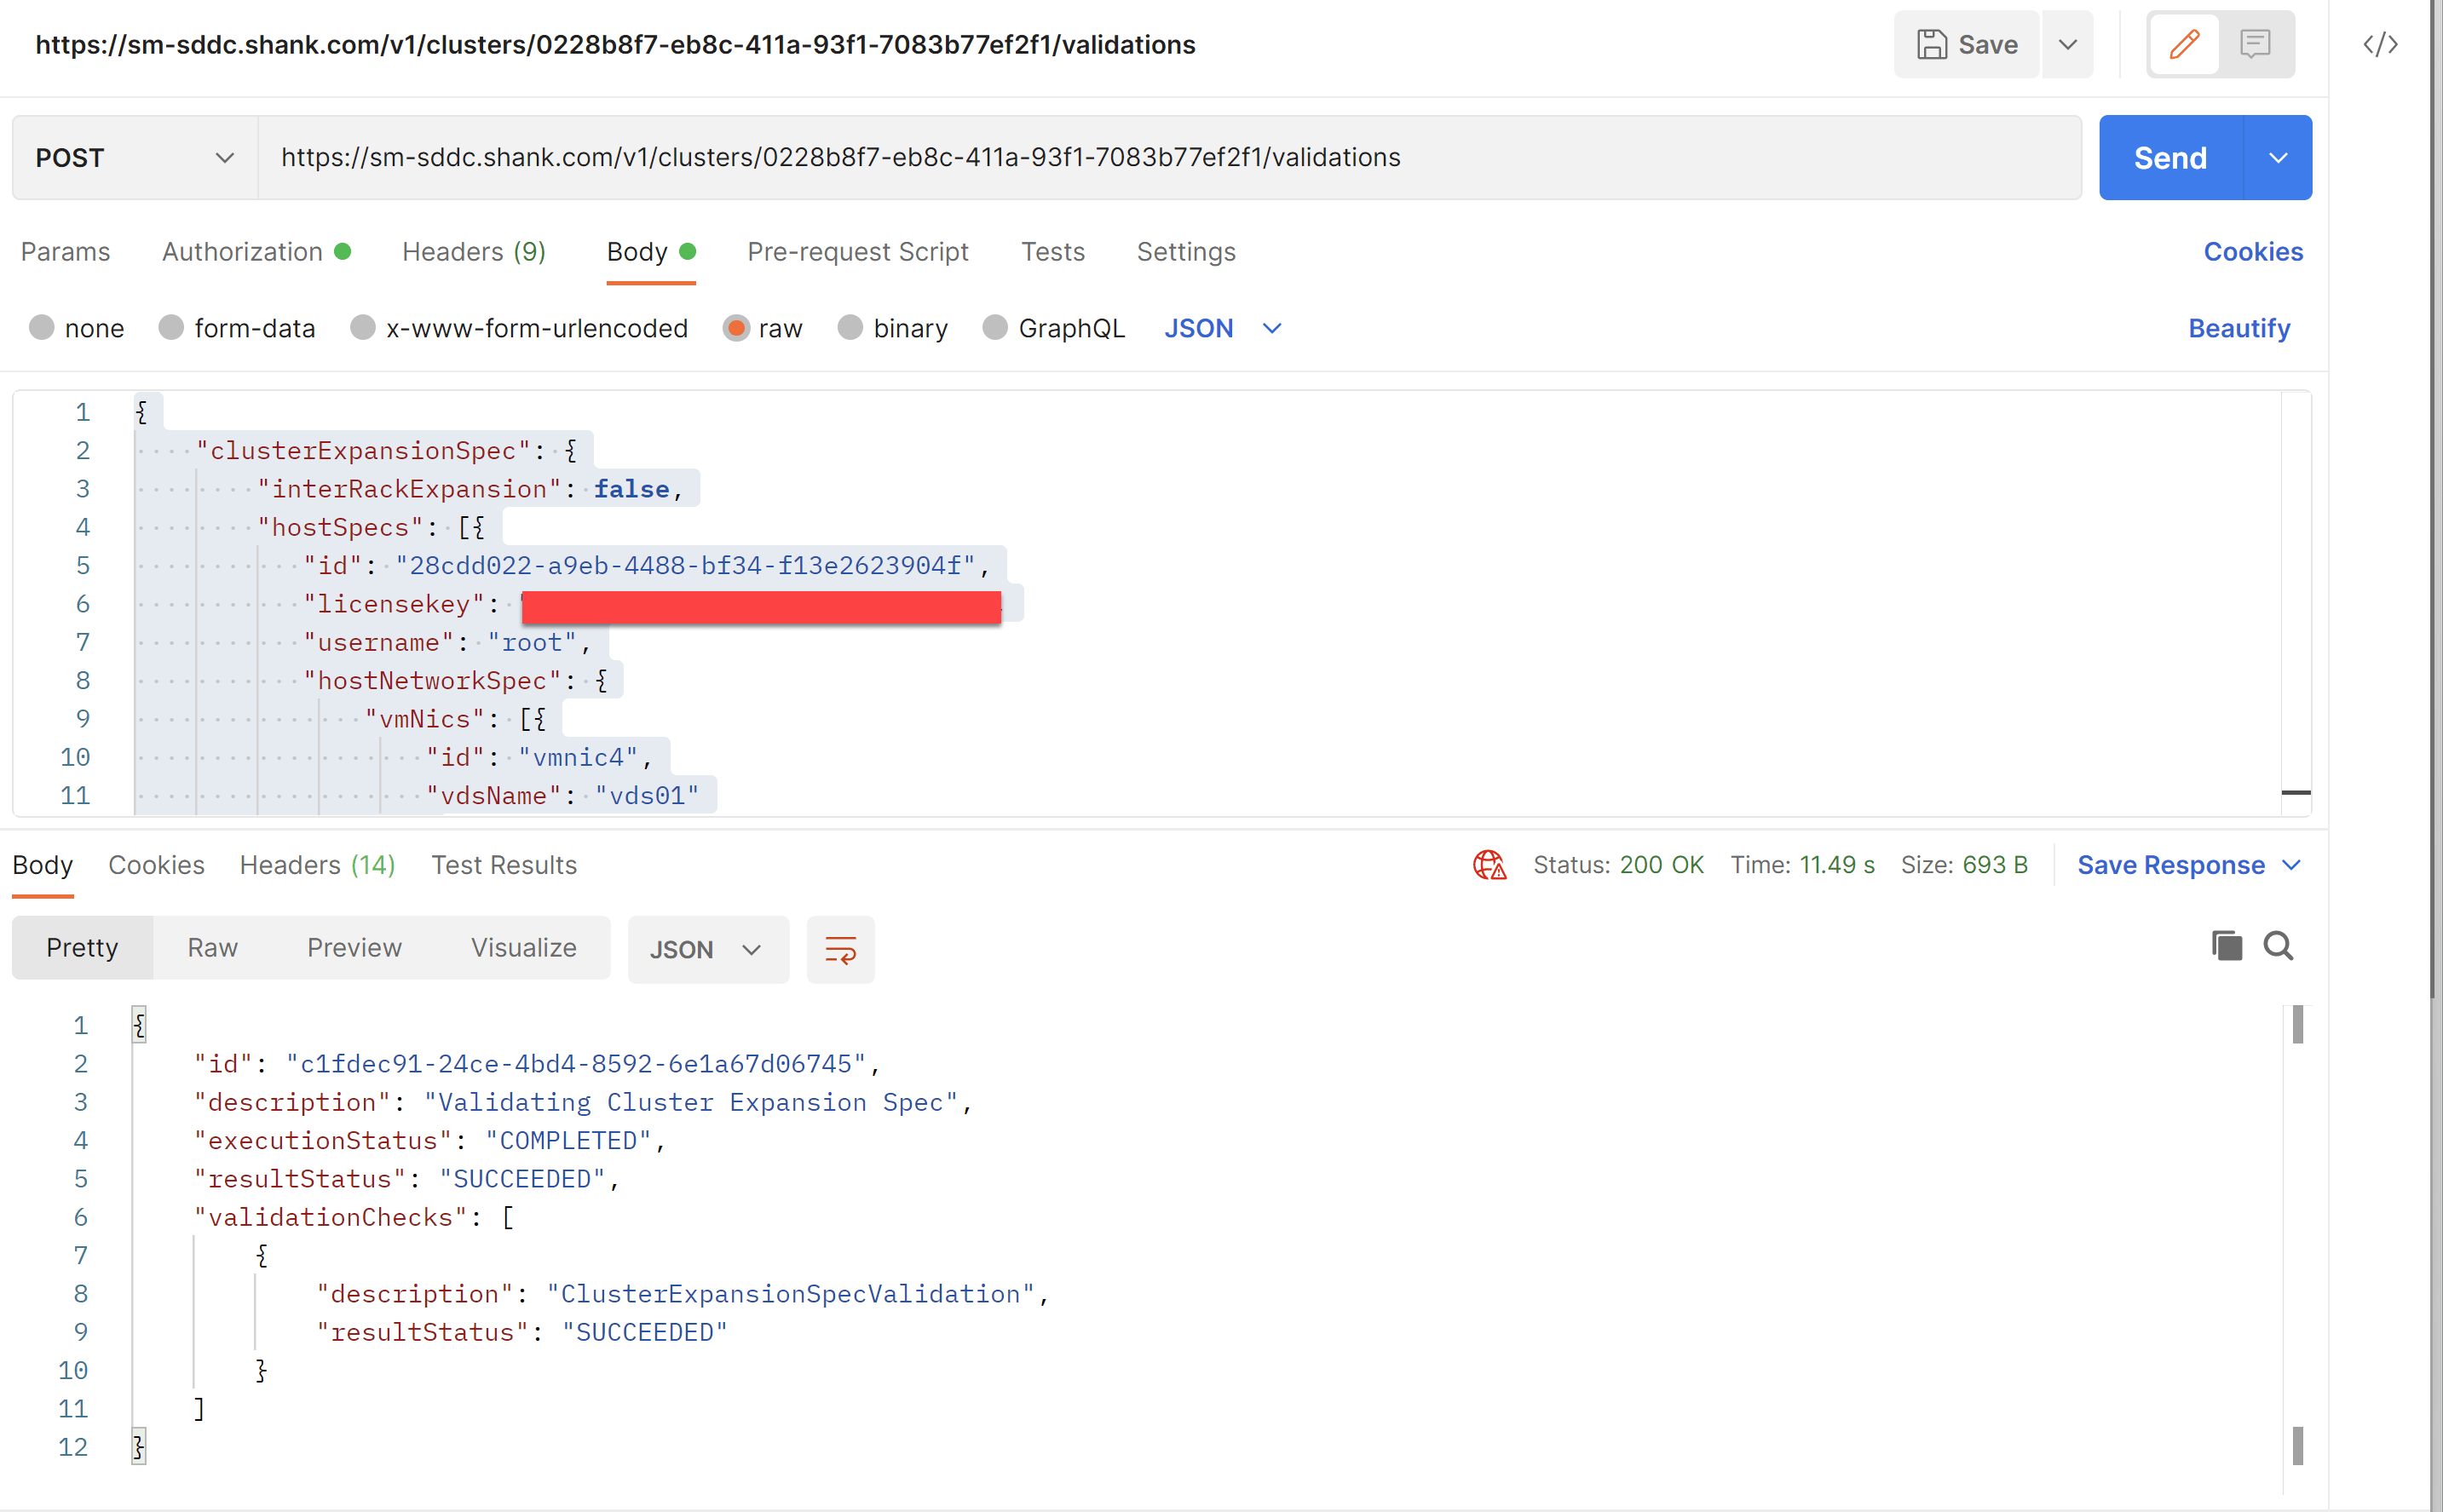
}'Using postman, I post the above to the URI.
The image below shows the validation was successful.
Step 5: Add the host to the Management Domain
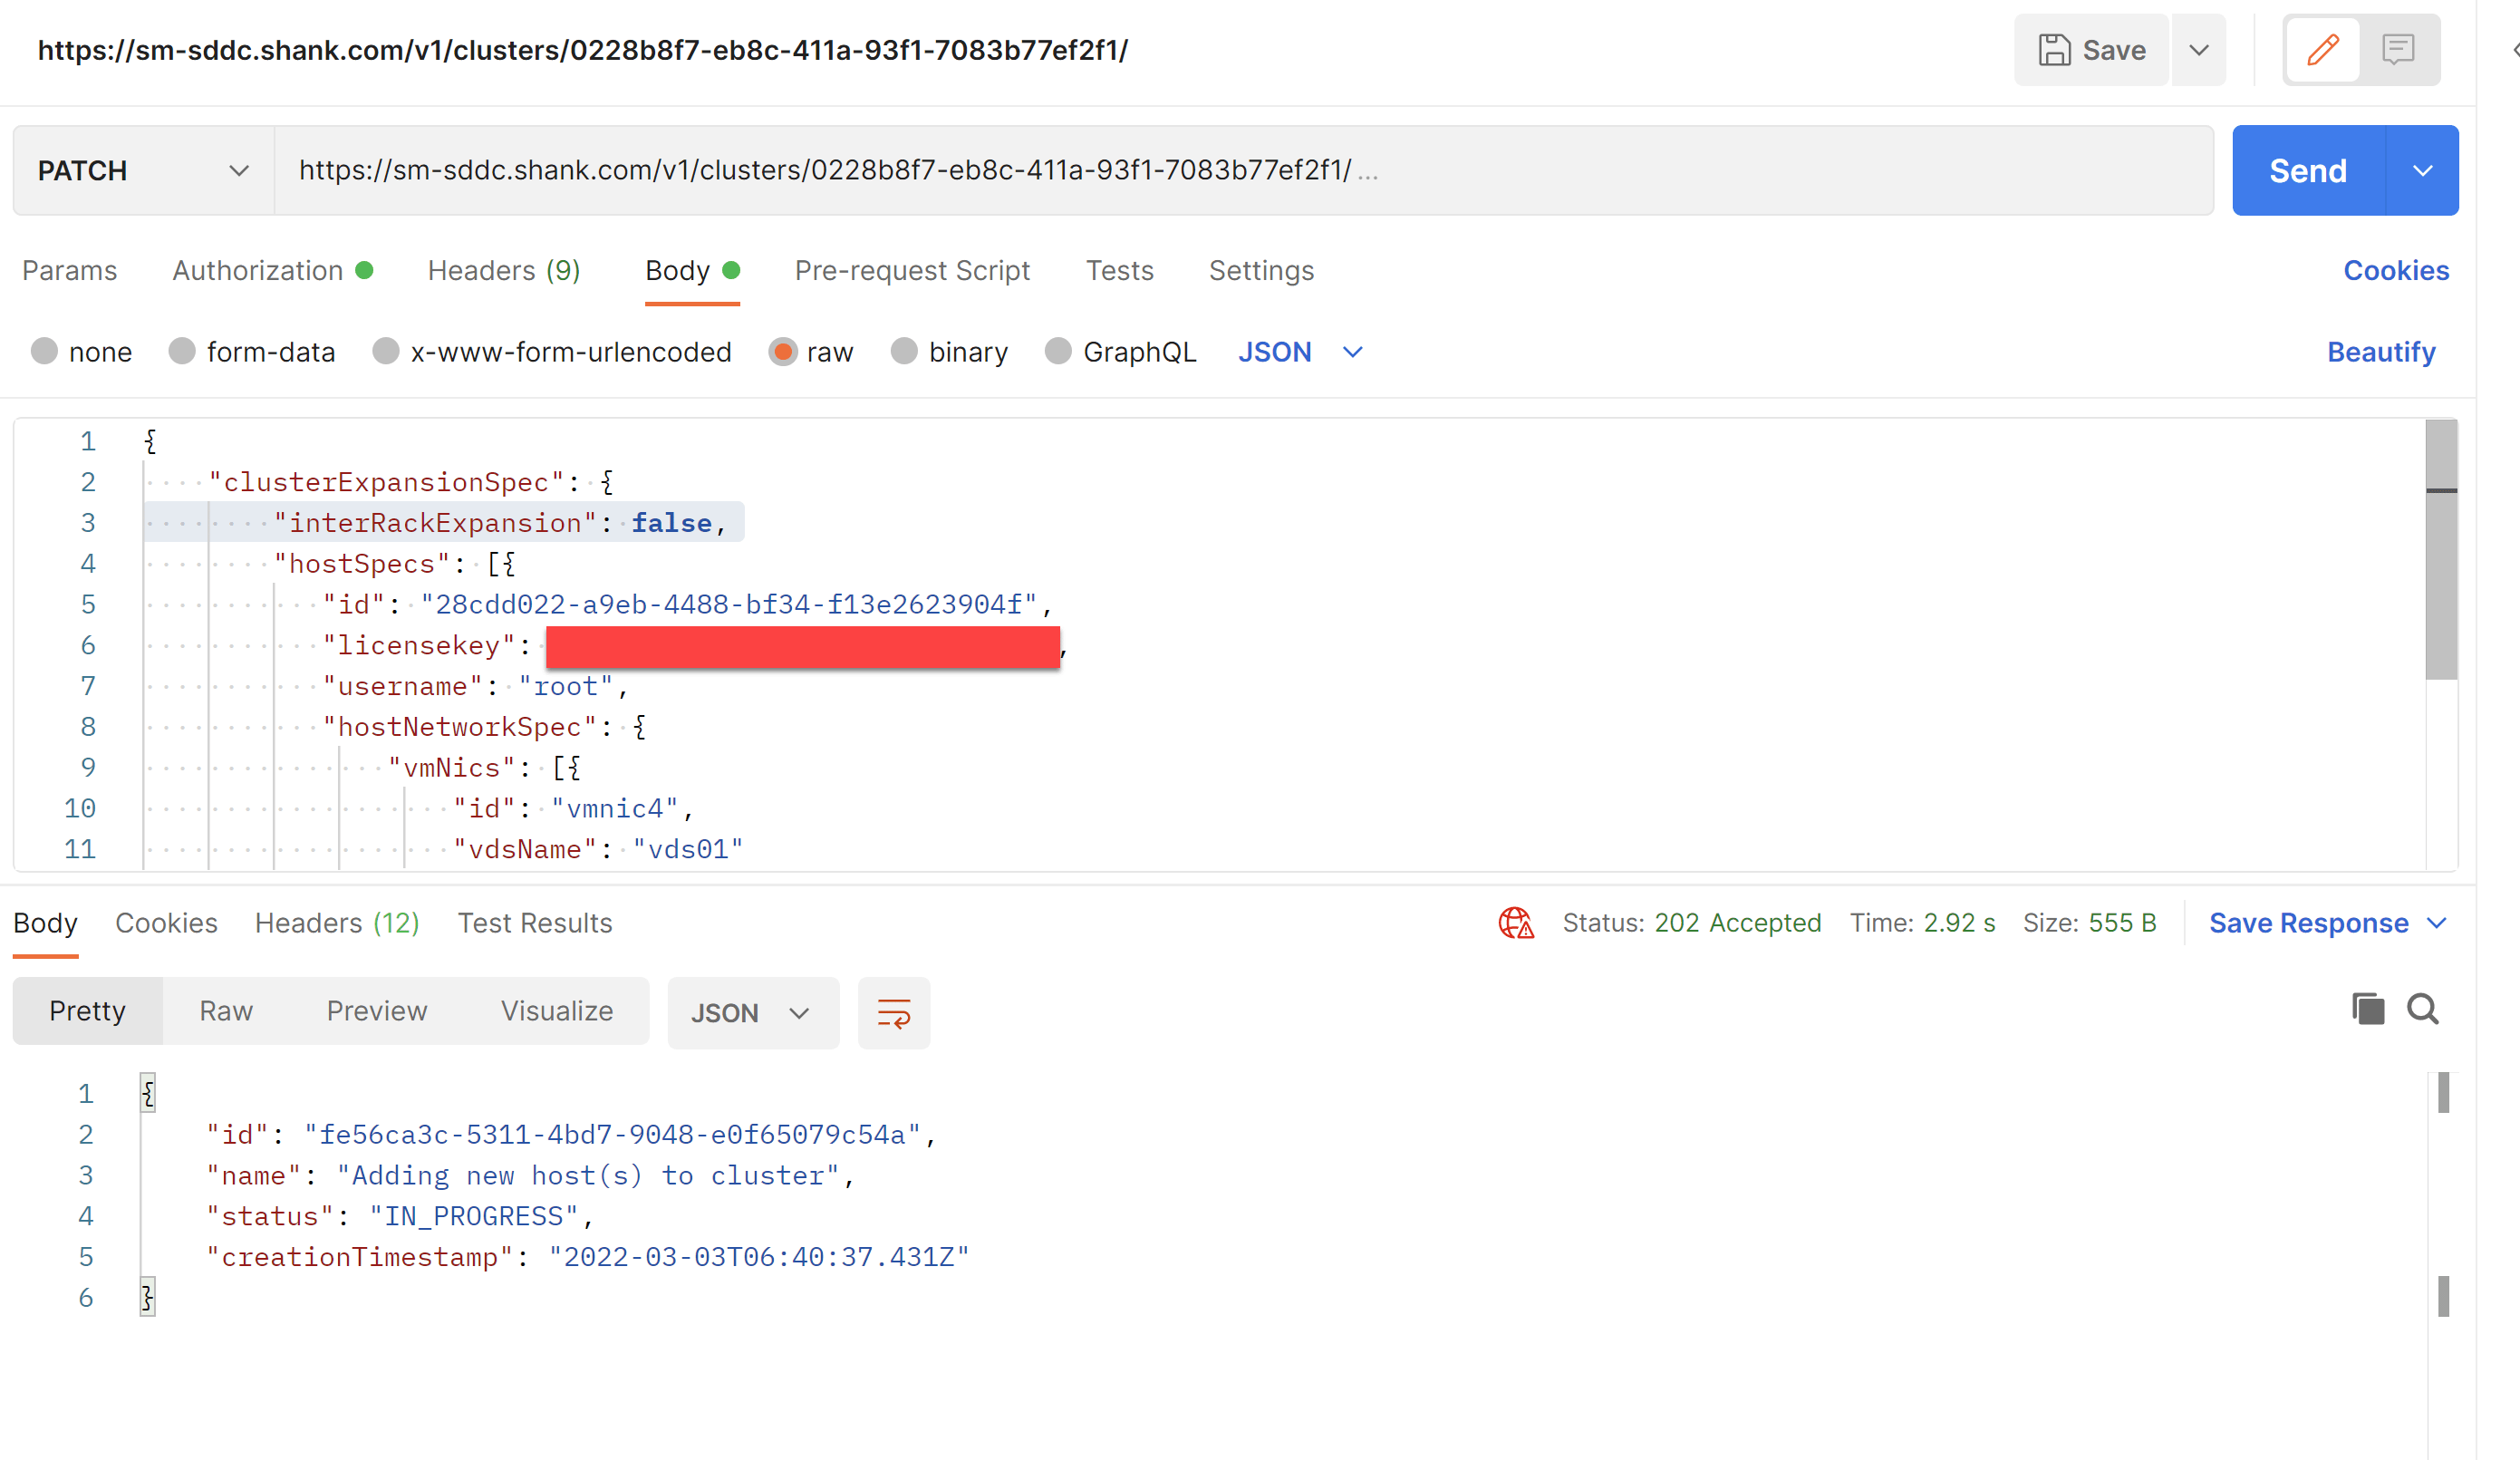
After the successful validation of the host, change the method from POST to PATCH, and modify the URI to what is shown below, changing the domain and cluster details to suit your environment.
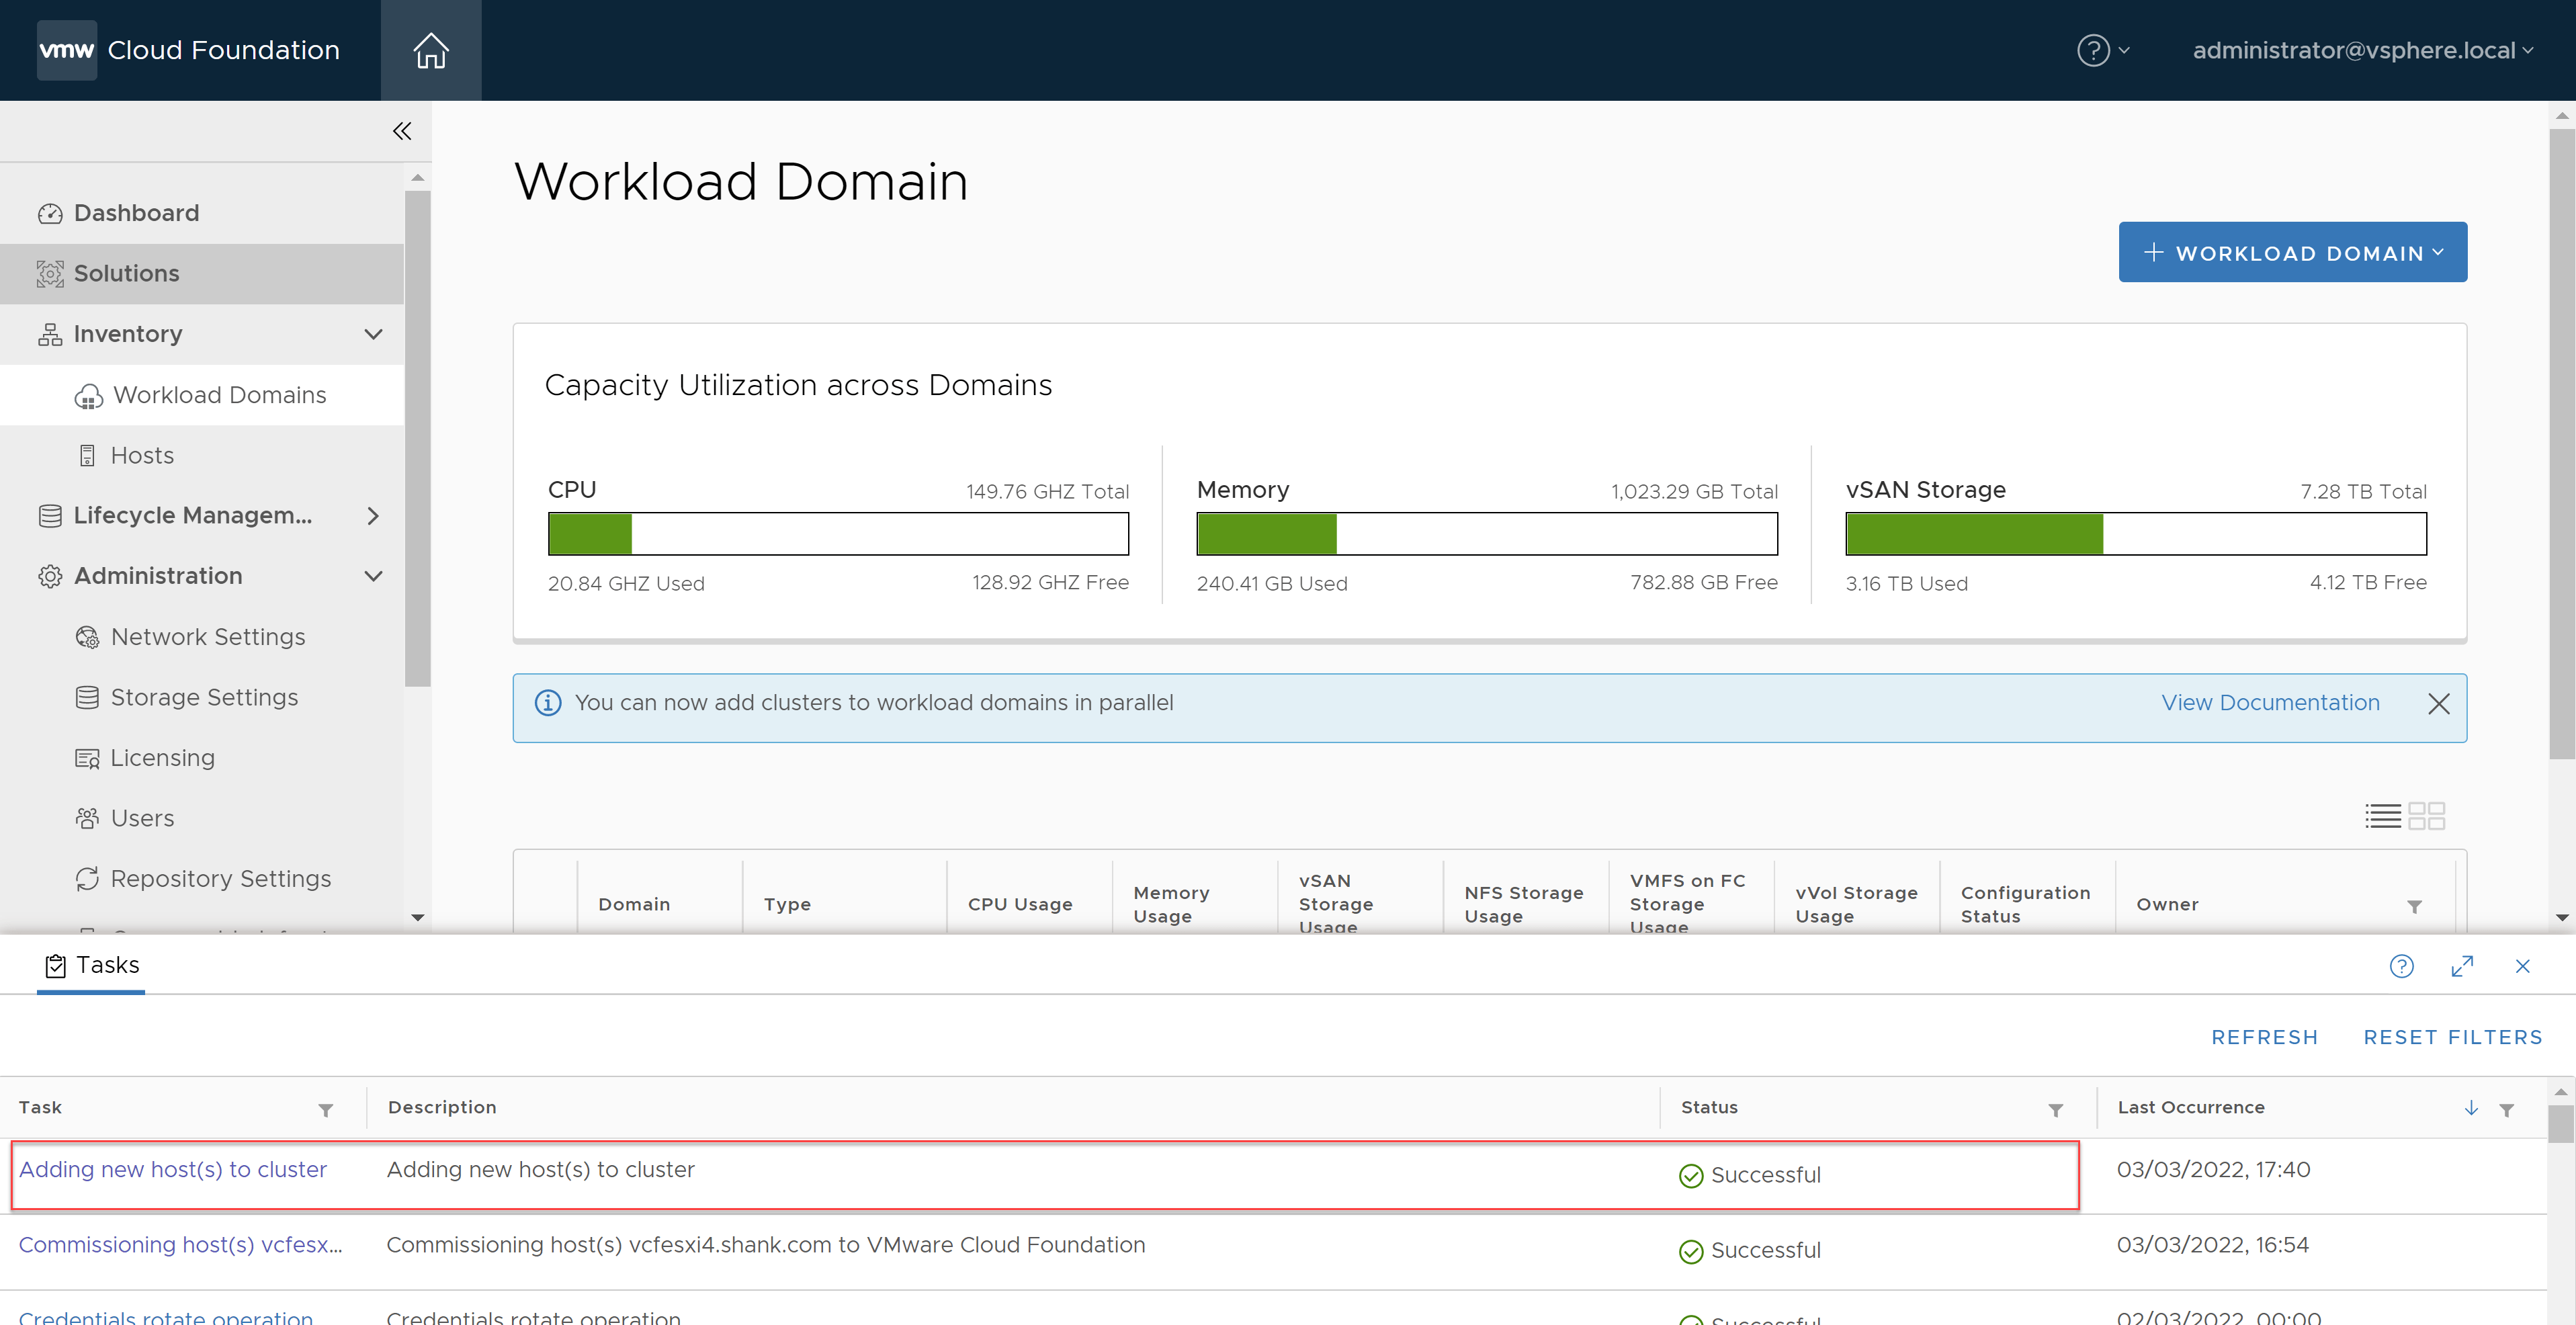
https://sm-sddc.shank.com/v1/clusters/0228b8f7-eb8c-411a-93f1-7083b77ef2f1/The SDDC Manager will begin to add the host into the domain, the progress can be monitored either using API or the GUI, as can be seen in the image below.
Conclusion
There are various reasons a host could fail unexpectedly, and hopefully you will not have to use this method in your environment. It is always preferred to remove hosts non-forcefully, however in this article I have demonstrated an approach that works for me. As mentioned in the article, perform some of these tasks at your own risk.